No, I have not given up on or completed my printrbot GO build, I’ve just been too distracted by making stuff to focus on it too much lately. I did purchase the printrboard LCD panel upgrade when it was briefly available and I’ve been working intermittently on adding that my GO, but that will get its own post (or most of one anyway) once I get that installed. I’ve also promised myself that the LCD panel will by the final major upgrade/mod before I tear it apart and stain it. As much as I am now fantasizing about dual extruders with bowden cables, if I don’t force myself to take care of the woodworking bit (funny that I actually think of that as woodworking, but that’s telling too, right?), I may never get around to it.
You may recall that the real reason for all 3d printers to exist is to replicate themselves, evolve and eventually render us irrelevant. I just wouldn’t feel right about claiming any affiliation with RepRap culture if I didn’t do my part, so when RepRap Squad reached out to me when his extruder broke a while back, I had to do my best to help him out.
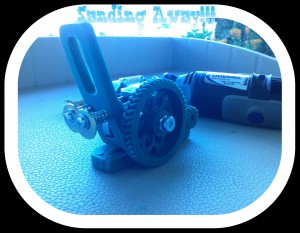
My first attempt was a miserable failure. It was one of my very first attempted prints in ABS and I struggled mightily to keep the Modified RepRapPro Huxley Extruder from warping off the bed into obvlivion, but after five or six attempts, I finally just let it complete one final (badly warped) print and sent it off to Oregon despite my feelings of failure of shame. Calen was very supportive of my feeble efforts and gave it the college try to get it working (sanding away like a madman), but ultimately even his fiercest efforts with a Dremel couldn’t coax it to extrude anything.
Sometime later, after I had made some crude attempts at calibration (funny story that, maybe I’ll share it sometime), Calen reached out to me again, having still not resolved his extruder-less situation satisfactorily. This time he had his eye on a bowden style extruder and was in luck in that I has cranking stuff out like crazy in black ABS at the time (the first attempt was green ABS as may or may not have been evident from the lone picture of it above).
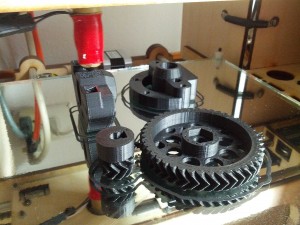
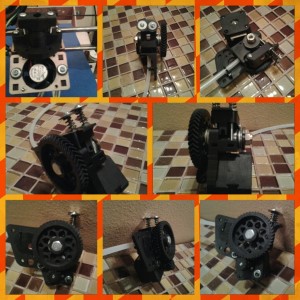
I printed out the body and the handle twice even with slightly different KISSlicer settings in the hopes of giving Calen the best chance possible of success and, although I can’t say that he’s printed anything with it yet, it is apparently the one that is on his heavily tricked out bot at the moment. He sent me this fancy collage of it too.
Around about the same time, my wife and I went on a short vacation wherein my trusty backpack saw daily use. It somehow escaped my eye until close to the end of our trip that our (now dearly departed) rabbit had chewed mostly through the cord stopper that keeps the main compartment closed (no, I did not kill her because of this, what kind of person do you think I am?).
So this is where most people would start looking for a new cord stopper. I’m sure they’re readily available online in every size, color and configuration and probably for pennies, but I have a 3d printer, so instead I set out to design and print one for it. My first instinct was just to copy the one on the bag and reuse the spring (the only part that was not plastic), but then I got all ambitious about the idea and decided to see if I could make one that could be produced entirely by a 3d printer. Luckily, it was a long weekend.
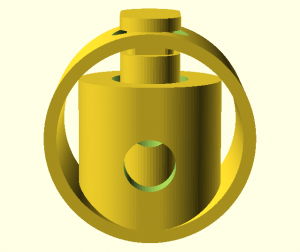
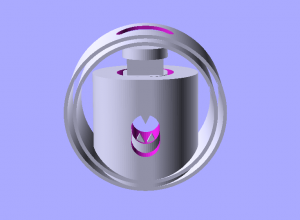
I started sketching it out in OpenSCAD with the idea being that the circular ring around the outside would provide the spring action. I left the thickness of that portion as a variable since I wasn’t really sure how springy the plastic was going to be, and as it turned out ABS worked pretty well for this application although I found that more than a single thread of ABS in the circular spring portion tended to lose some of it’s elasticity. I was able to vary the springiness a little by varying the extrusion width and got something that basically worked out of it.
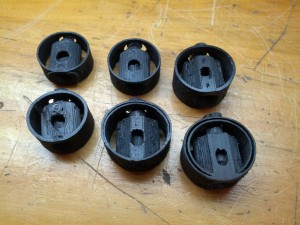
What kind of a nutjob would I be if I stopped at merely functional though? I pressed on through the three day weekend (did I mention that my wife works weekends? she’s a super-cool zookeeper, so the tradeoff is tolerable) and after six or so more iterations I arrived at this very fancy, highly customizable, fully 3d printable cord stopper.
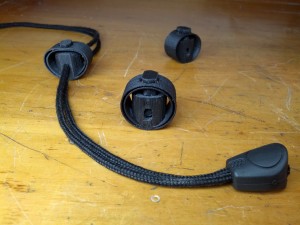
I even went the extra mile to learn how to make my SCAD file compatible with Makerbot’s customizer on Thingiverse (a VERY cool tool) so that folks with no OpenSCAD experience can still tweak it to their heart’s content, choosing one or two circular springs, with or without teeth on both or only one side and of course what size they want along several dimensions.
Making stuff for your bot is fun, but making stuff that others can actually use and enjoy is downright thrilling.
It’s awesome to witness your Printrbot & OpenSCAD work going to such thrilling good use.
I must say that I cant wait to try out the new extruder you printed for me. It shouldn’t be too much longer before my RAMPS and other electronics show up. The extruder gears mesh really well, smooth like butter. Thanks again Ei8htohms for helping to get me back up and running. You are what the reprap culture is all about. Keep up the good work.