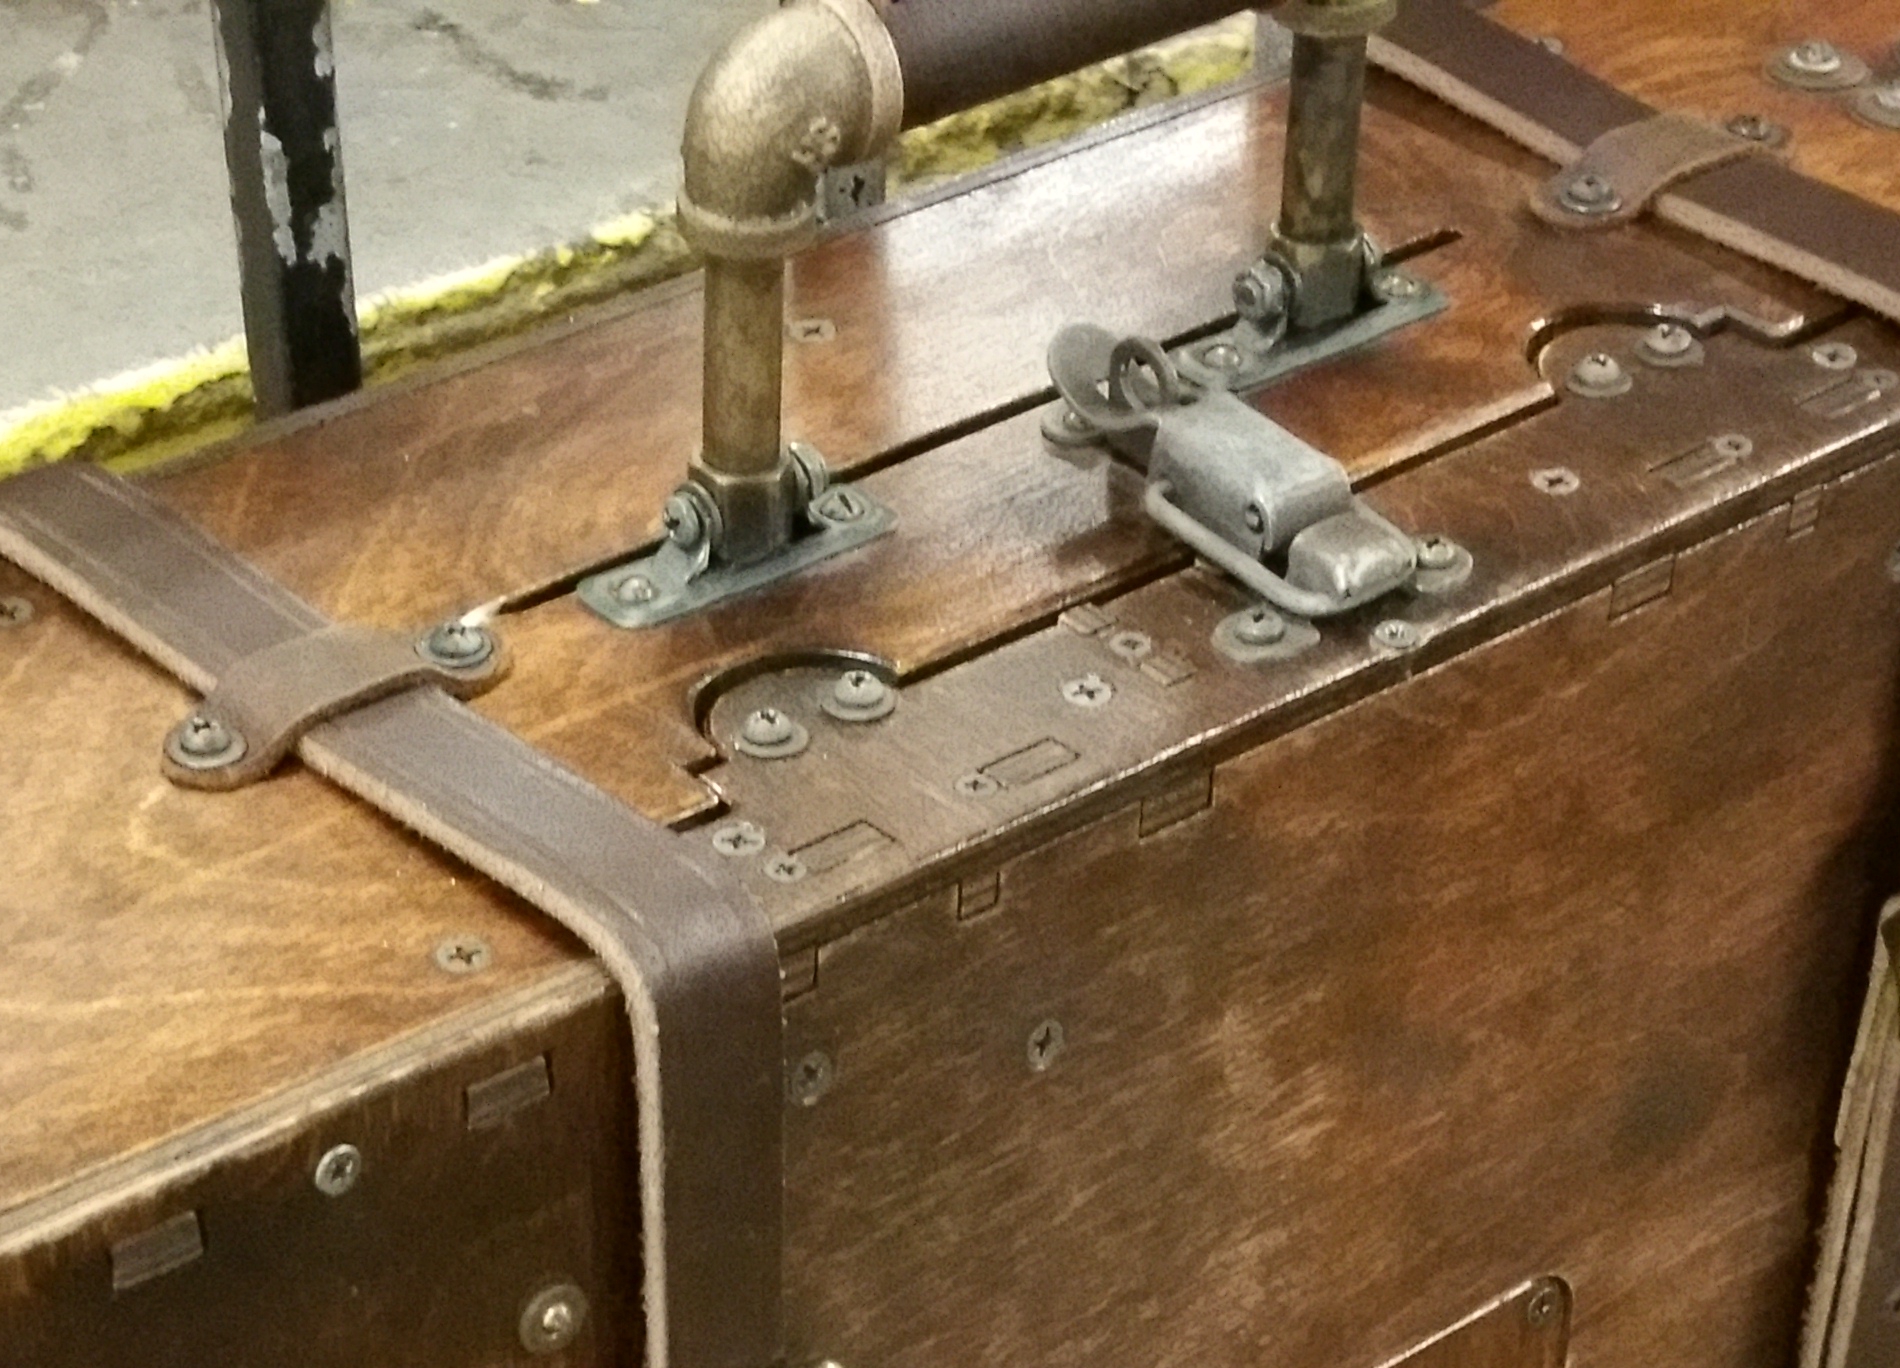
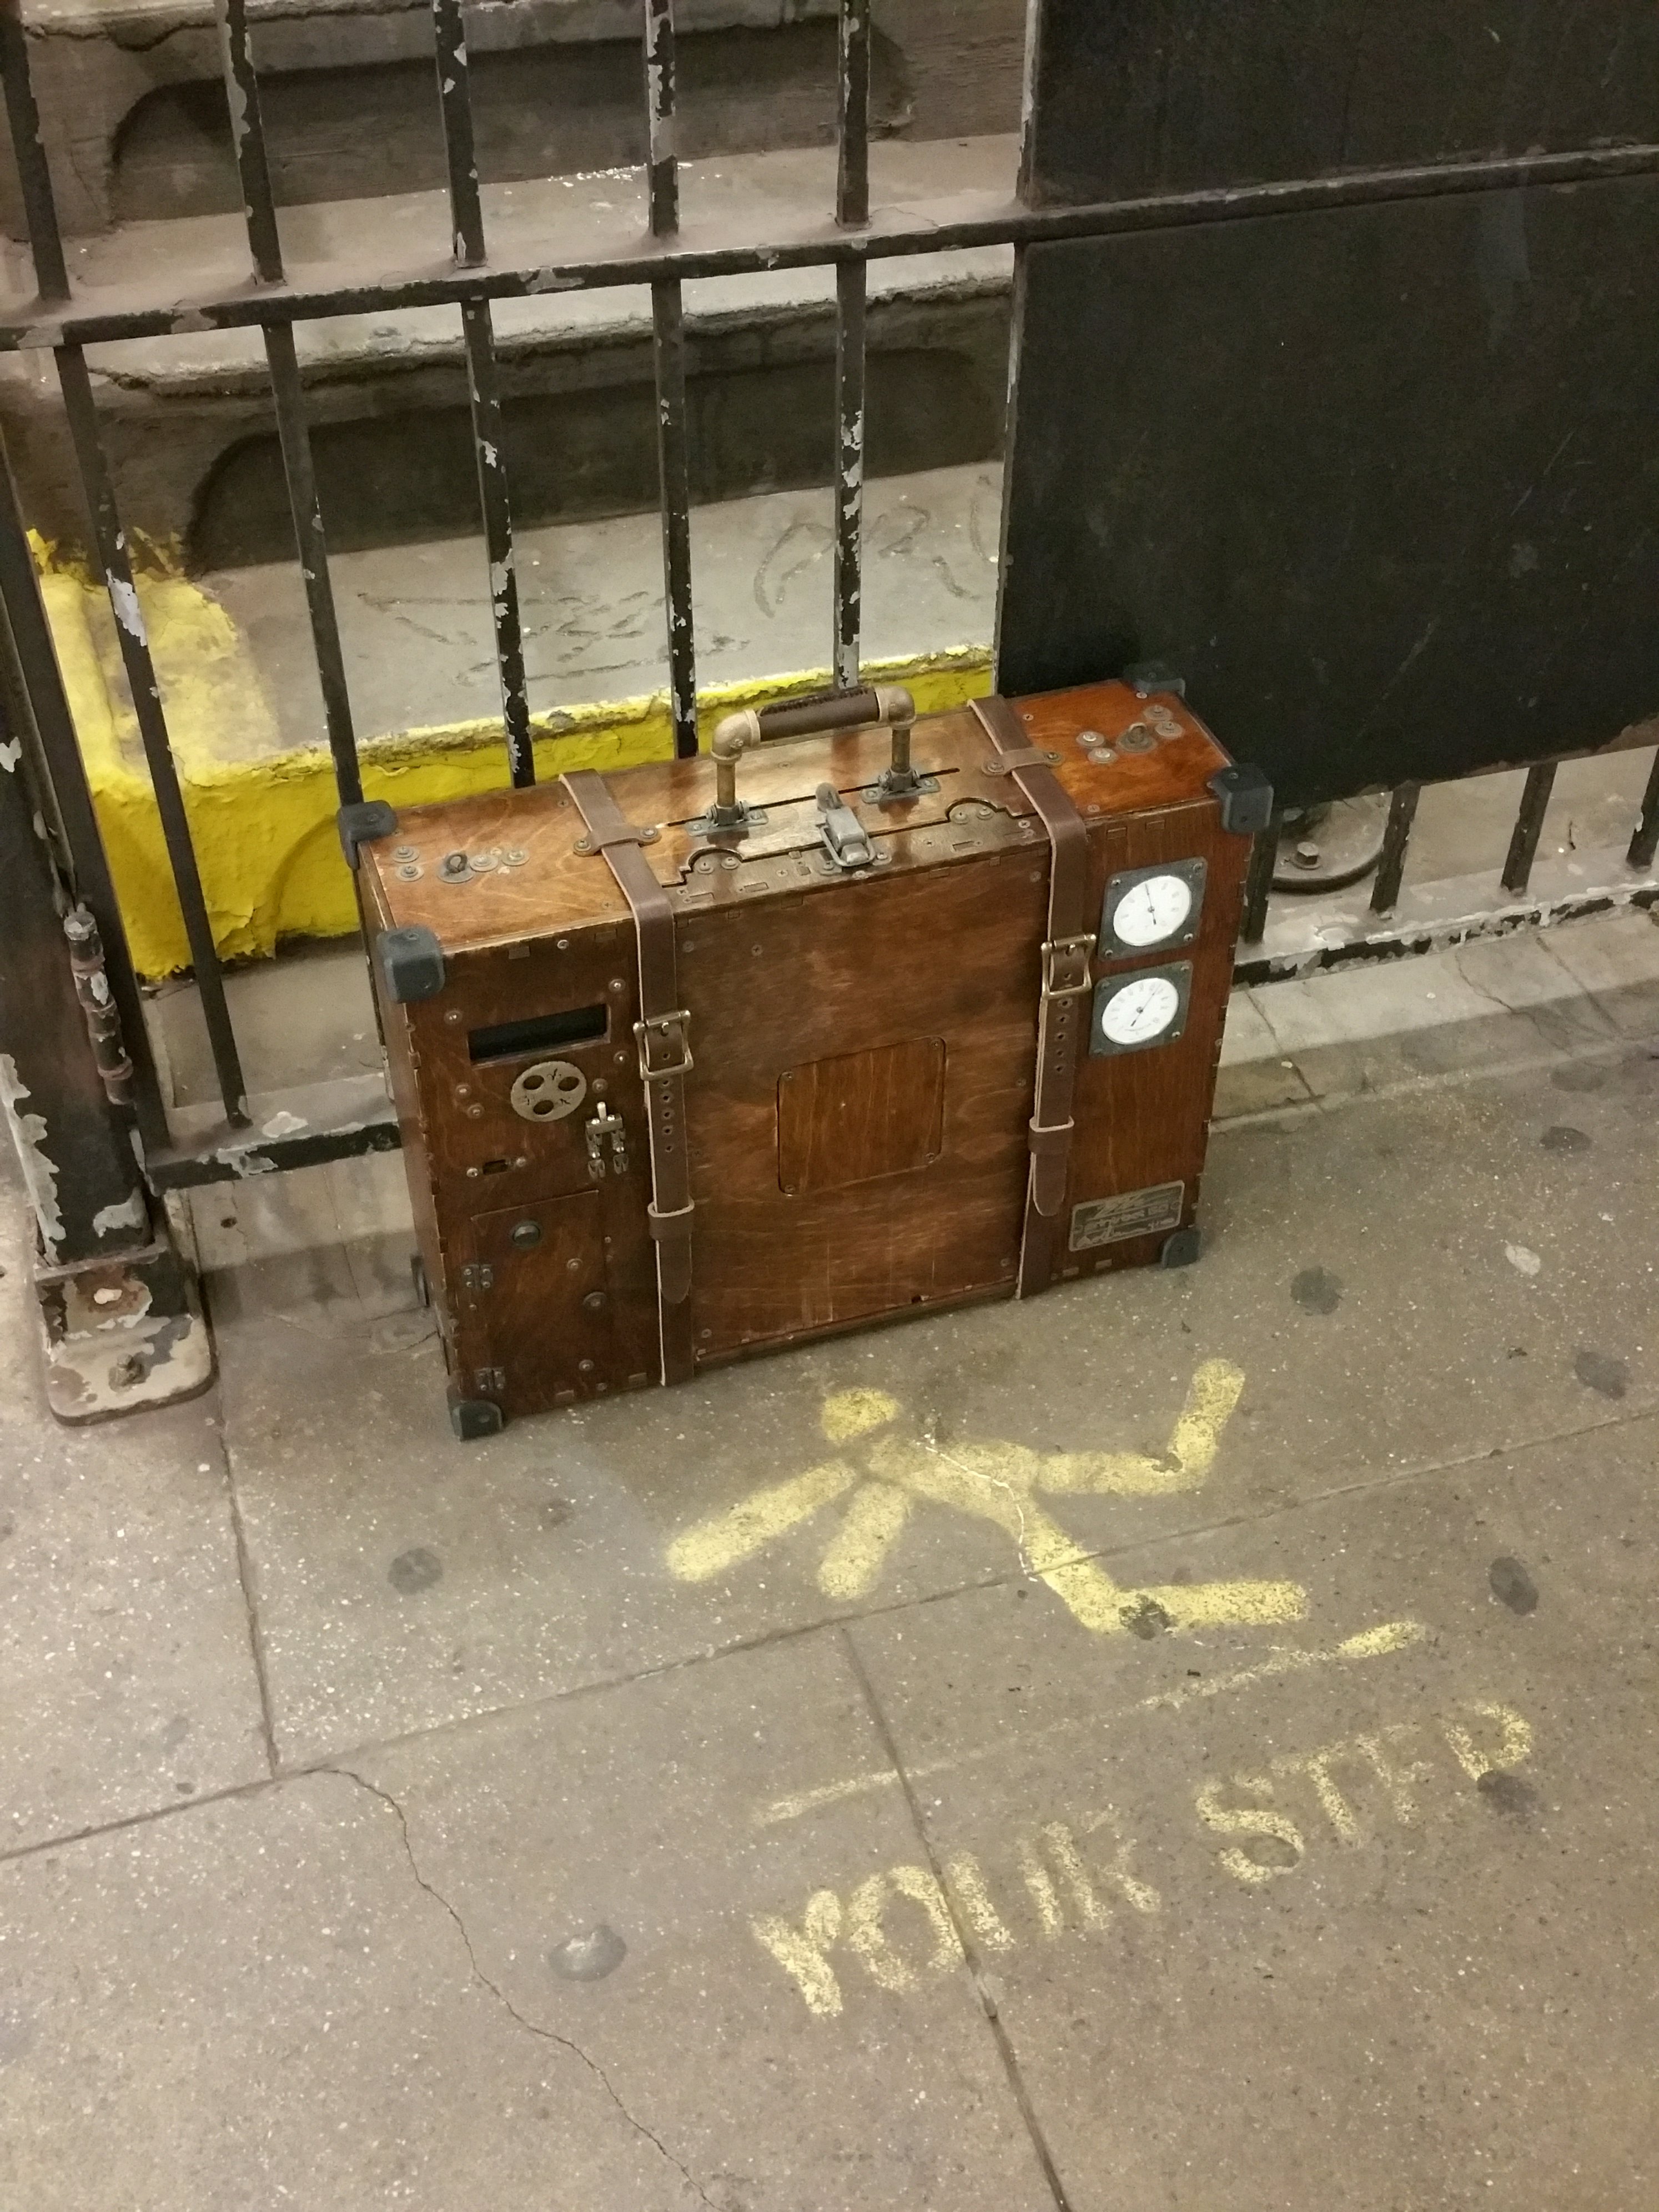
Since before I even owned the GO! (v.1), I had a vision in my mind about turning it into a steampunk steamer trunk kinda thing, and critical to that vision were suitcase belts. I can’t imagine a single feature (well, in addition to darkly stained wood) that says “olde timey” like leather belts up the sides of a piece of a luggage, so I knew I needed to get something like that working for me at some point.

I got held up for some time on the idea of finding straps that were actually designed for such a thing but with little luck, so I eventually just starting looking for belt makers and custom leather suppliers to see if I could have something made up to order without breaking the bank. It turned out I found Leibering’s Leatherworks on eBay (leatherstitcher) and, after a little back and forth via email, they agreed to make some straps in a slightly thinner size than their usual fare as long as I could provide them with the buckles. I had the straps made with no holes so I could place them exactly where and how I wanted and voila.

I cut small leather “brackets” (belt loops I guess) and screwed them onto the top and bottom of the bot to keep the straps in place and help make it look like they were supposed to be there.
I shared some pictures on Instagram, Google+ and Reddit and something weird happened. A bunch of news aggregator websites devoted to 3d printing started picking it up and writing “articles” about it. The weird part was that not one of them actually contacted me to get better pictures or ask me any questions about it even though several of them clearly went over this blog in some detail to get more info and lift pictures.
The most egregious of these articles was the one on 3DPrint.com which seems to clearly imply that I collaborated with them and supplied quotes and images for the piece, none of which could’ve been further from the truth. It was weird and disturbing to see the liberties that had been taken with my efforts but when I saw that the same thing had been done in varying degrees by a host of other sites, I finally decided to shrug it off and go on about my business.
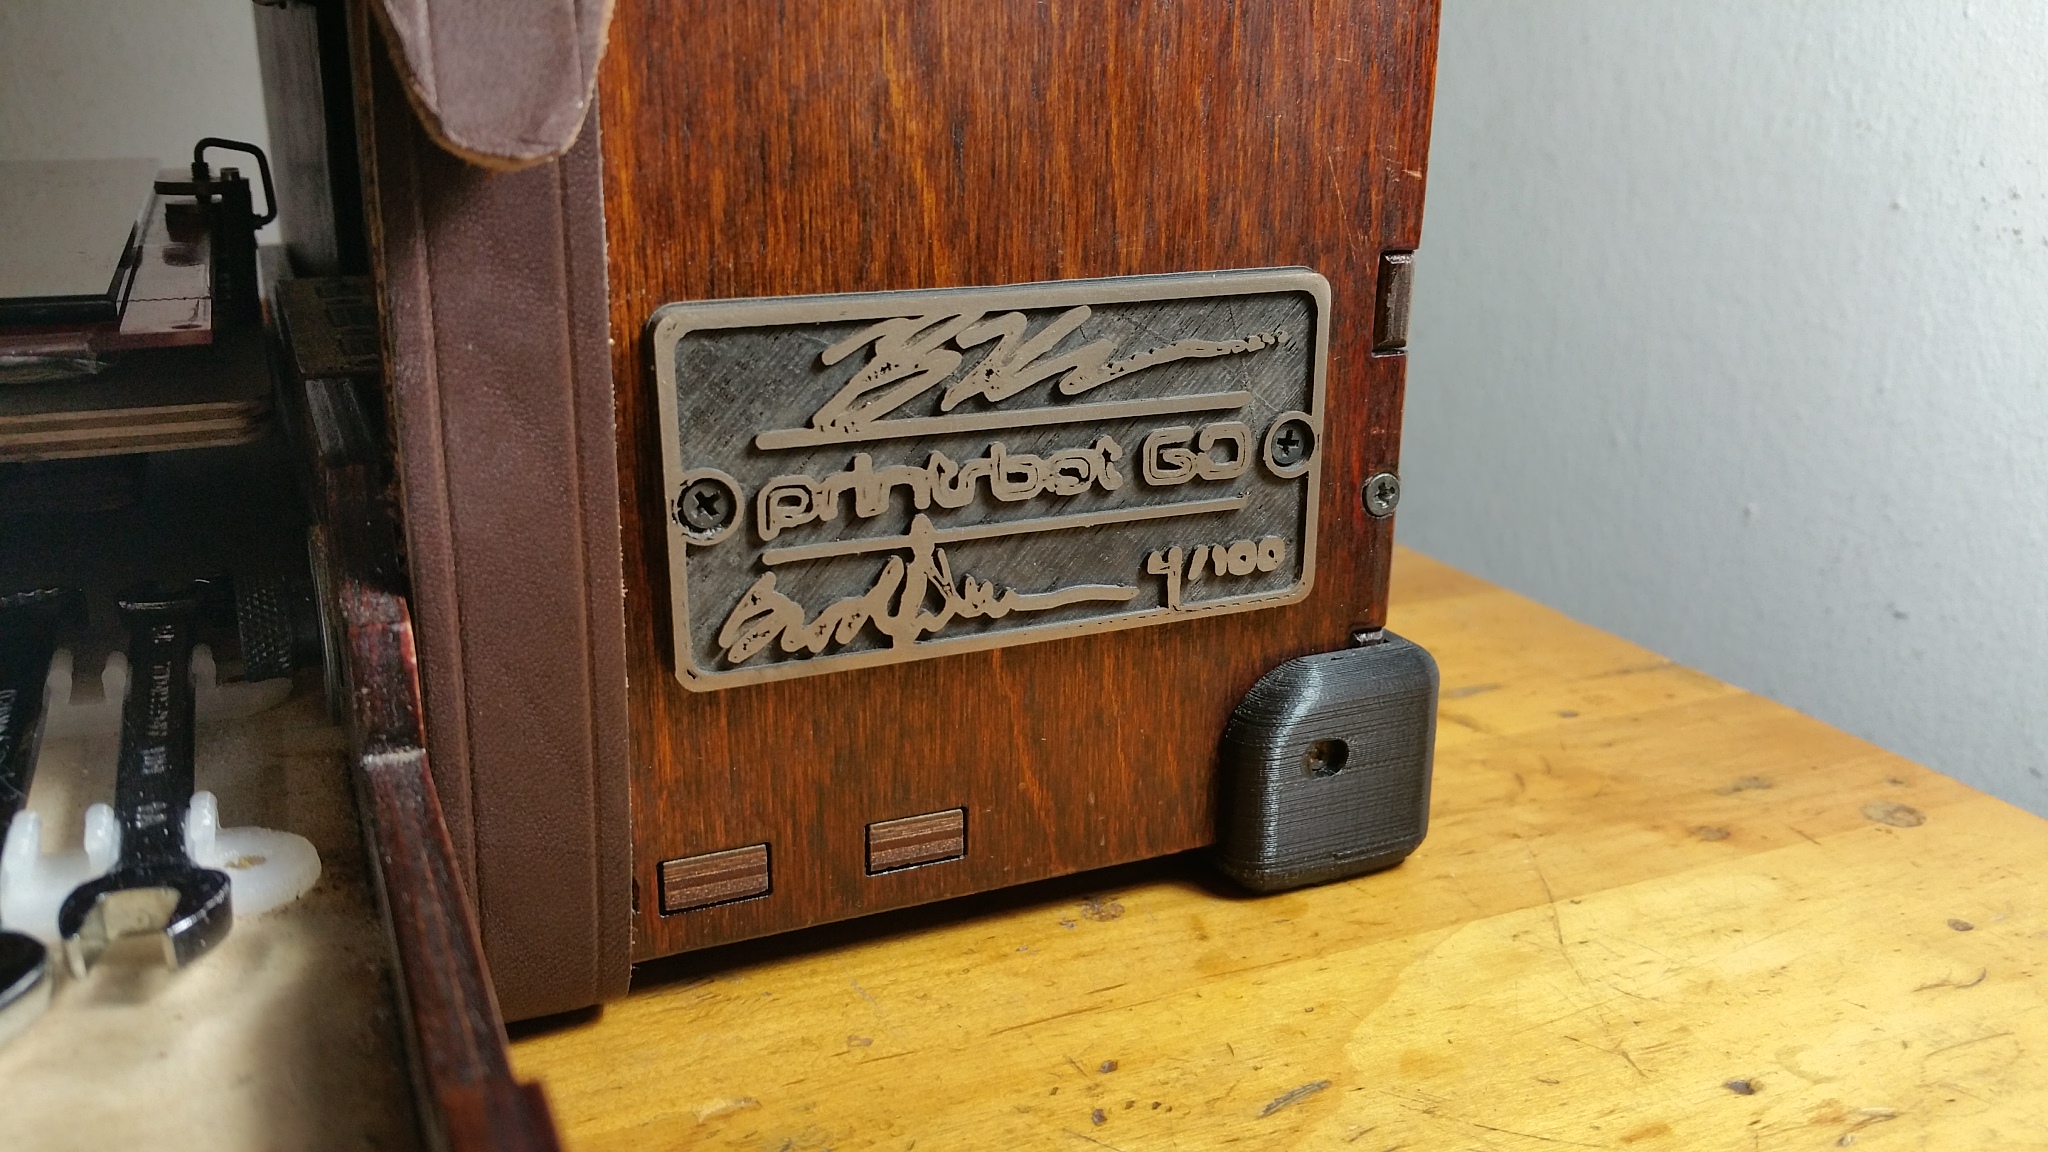
After installing the internet-approved suitcase belts, I decided to hone my Bronzefill skills on a signature panel for the very limited edition GO! v.1. Printrbot had supplied me with a signature panel for the GO! which had the name of the model laser engraved on it with the edition number (4/100) and the signatures of Brook Drumm and Ben Heck, the gentlemen who collaborated on the original design.
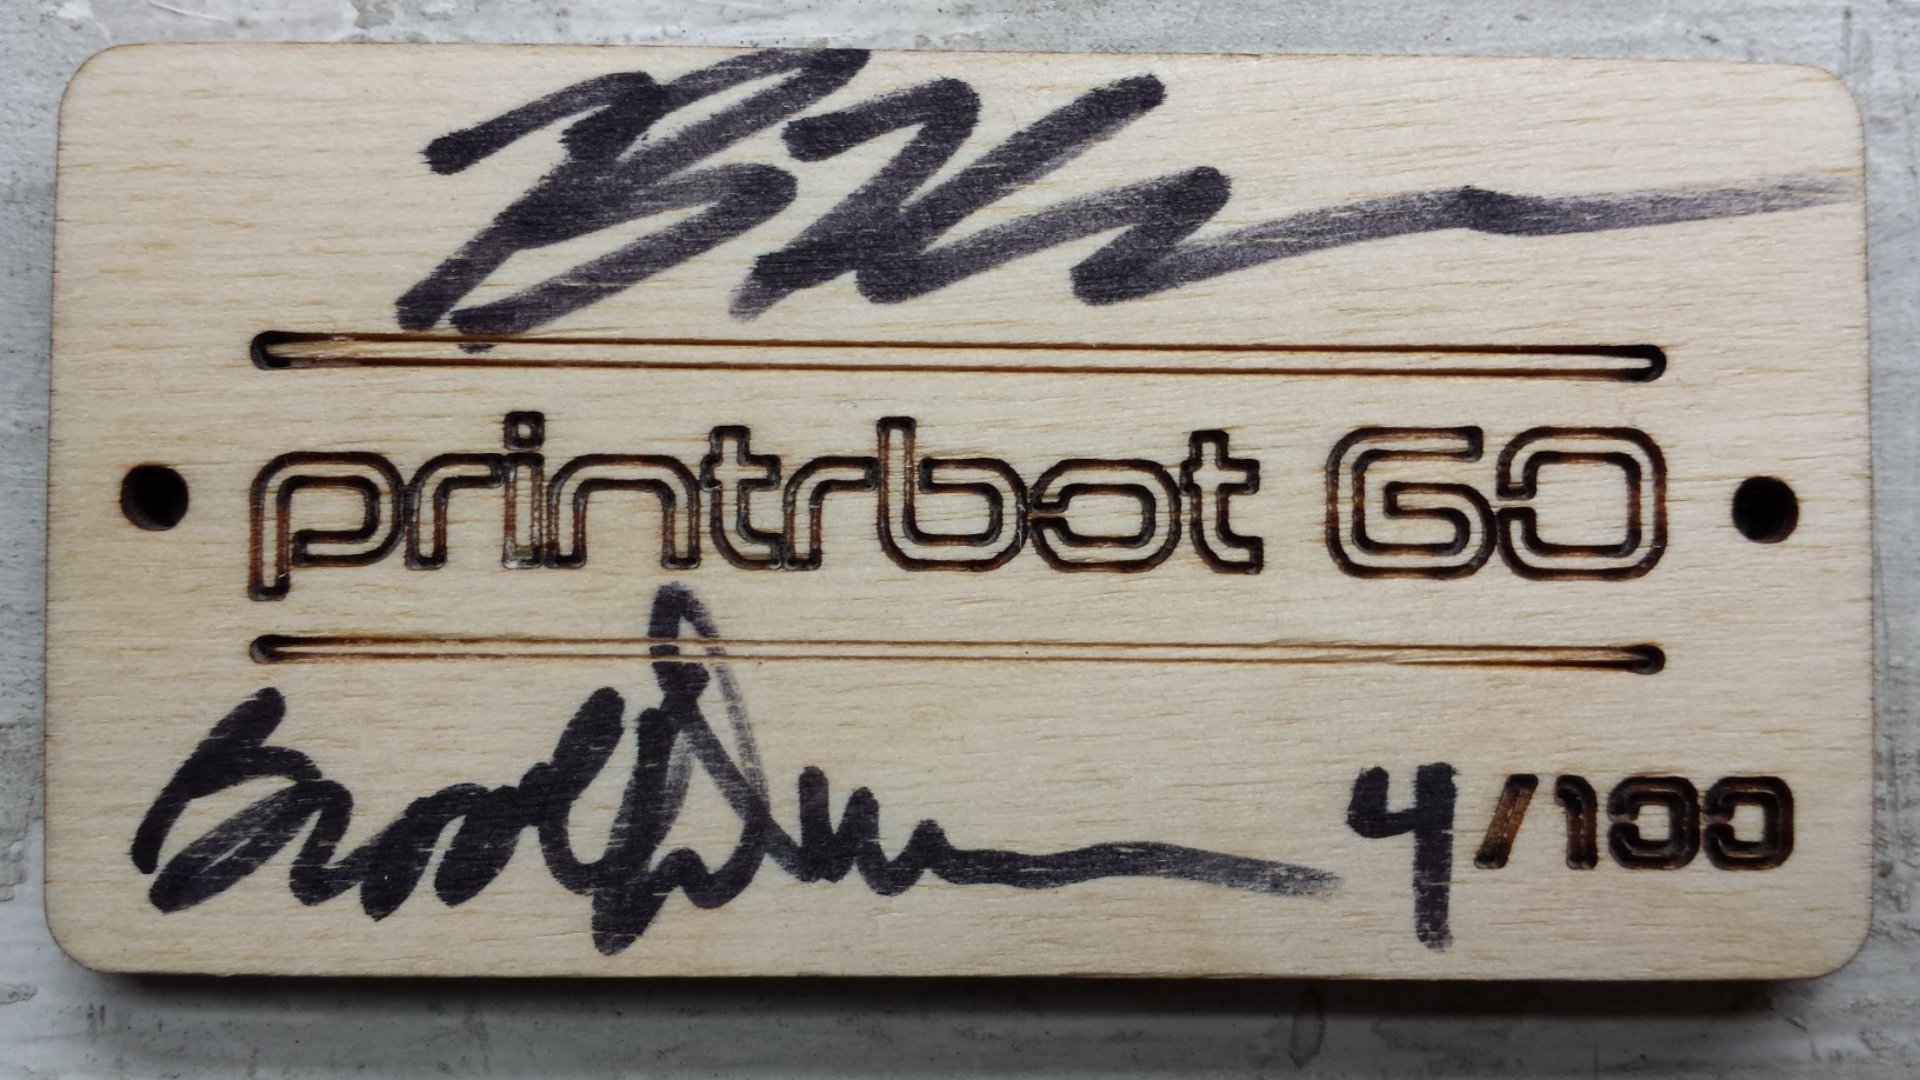
While the supplied signature panel was a perfect compliment for the original design and finish of the Printrbot GO!, it just seemed too jarring of a contrast to put the raw birch panel against the stained wood of my steampunk version, so I set about turning it into an STL file so I could 3d print it in ColorFabb Bronzefill instead.
The first thing I did was take the above “top down” picture of it, which I imported into GIMP to convert it into pure black and white. I thickened up some of the lines and otherwise “cleaned up” the image file before importing it into Inkscape so I could convert it into a DXF file and use that in OpenSCAD to get something in 3d. It never fails to amaze me that this kind of intense image manipulation and file creation can be accomplished with freely downloadable, open source software.
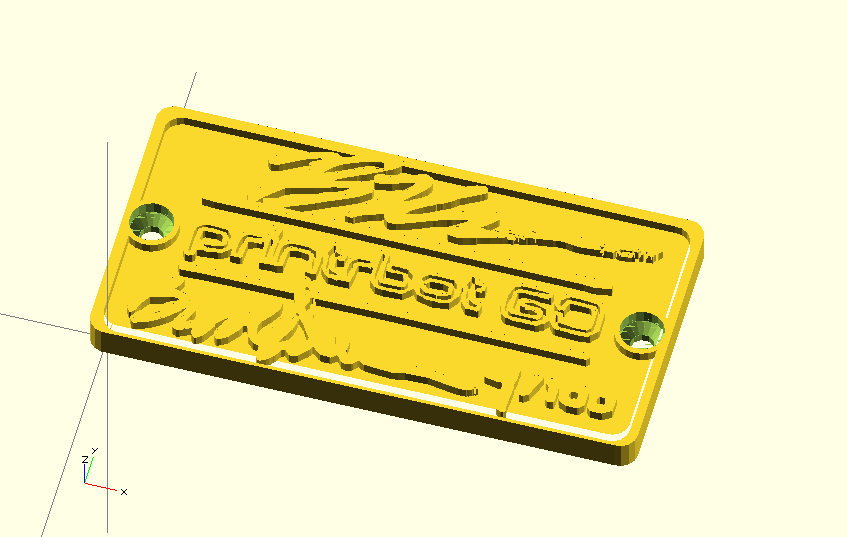
I actually tried a couple times to get Shapeways to quote me a price for something in “Antique Bronze” or similar, but I wasn’t able/willing to clean up the STL sufficiently to meet their requirements for resolution, etc. Even if I was happy to roll the dice with little bits possibly breaking off where the Sharpie signatures trailed off and that kind of thing, they weren’t interested in diverging from their material specific policies. Ultimately I’m sure this saved me a lot of money even if it did cost me some time and frustration.
Getting it to print successfully in Bronzefill was a whole other kettle of fish. Bronzefill needs to be bone-dry in my experience to have any chance of printing successfully and still required very slow printing speeds to keep from jamming. I was finally able to sweet talk it out of a 0.35 mm nozzle to get the best X-Y detail out of the model for results I deemed “acceptable” (I still plan to redo it in the near future).
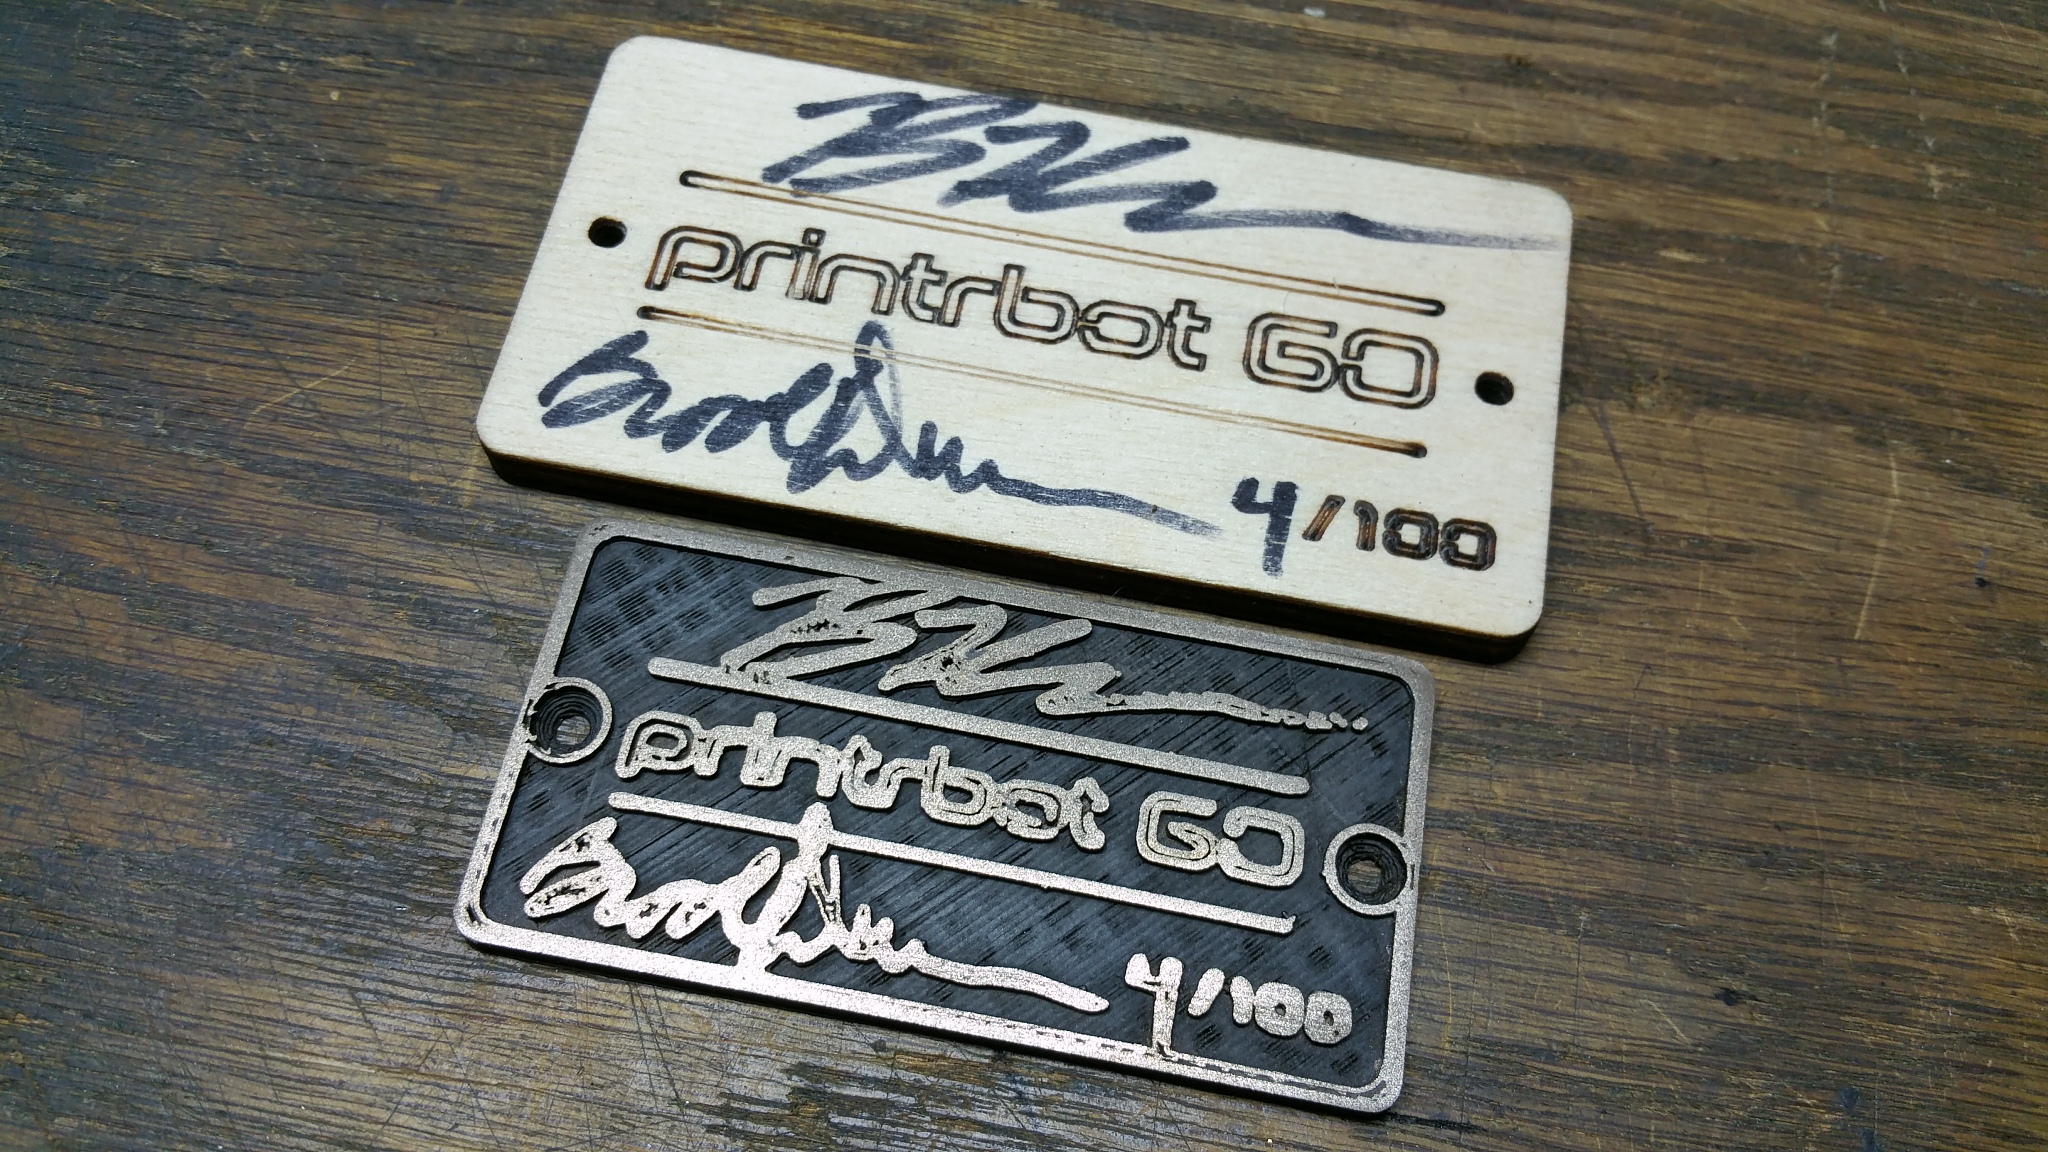
This is the best way to use Bronzefill to positive effect in my experience thus far. If you design the model with raised, flat portions that you can sand/polish after the fact and then dust the whole model in flat black spray paint before the final finishing of the shiny surfaces, it gives it a nicely aged look without too much fuss and muss. I’d still like to try a tumble polisher at some point, but I haven’t been able to achieve results I’ve been happy with with conventional polishing techniques on larger or recessed surfaces. Your mileage may vary of course.
And here it is installed on the bot.
I’m so close to “done” with the aesthetic mods that I am actually finding it hard to get motivated to add the lights (and remove/replace the vestigial power switch). And when I really step back and take it it… I’m delighted with the way she looks already.
Wow! That looks awesome! I assume the print quality is still good too?
It prints great. None of the aesthetic mods compromised the functionality and I made a lot of functional mods as well, so the overall performance is pretty good.