I told myself that after installing the LCD panel that I wouldn’t attempt any other major mods until I bit the bullet and stained the damn thing. Getting the LCD mount sorted out coincided with my last weekend as a bachelor (my wife quit her job that had her working weekends – a mixed blessing as they say) so I disassembled the thing over the course of the week and spent the weekend staining, shellacking, sanding and reassembling.
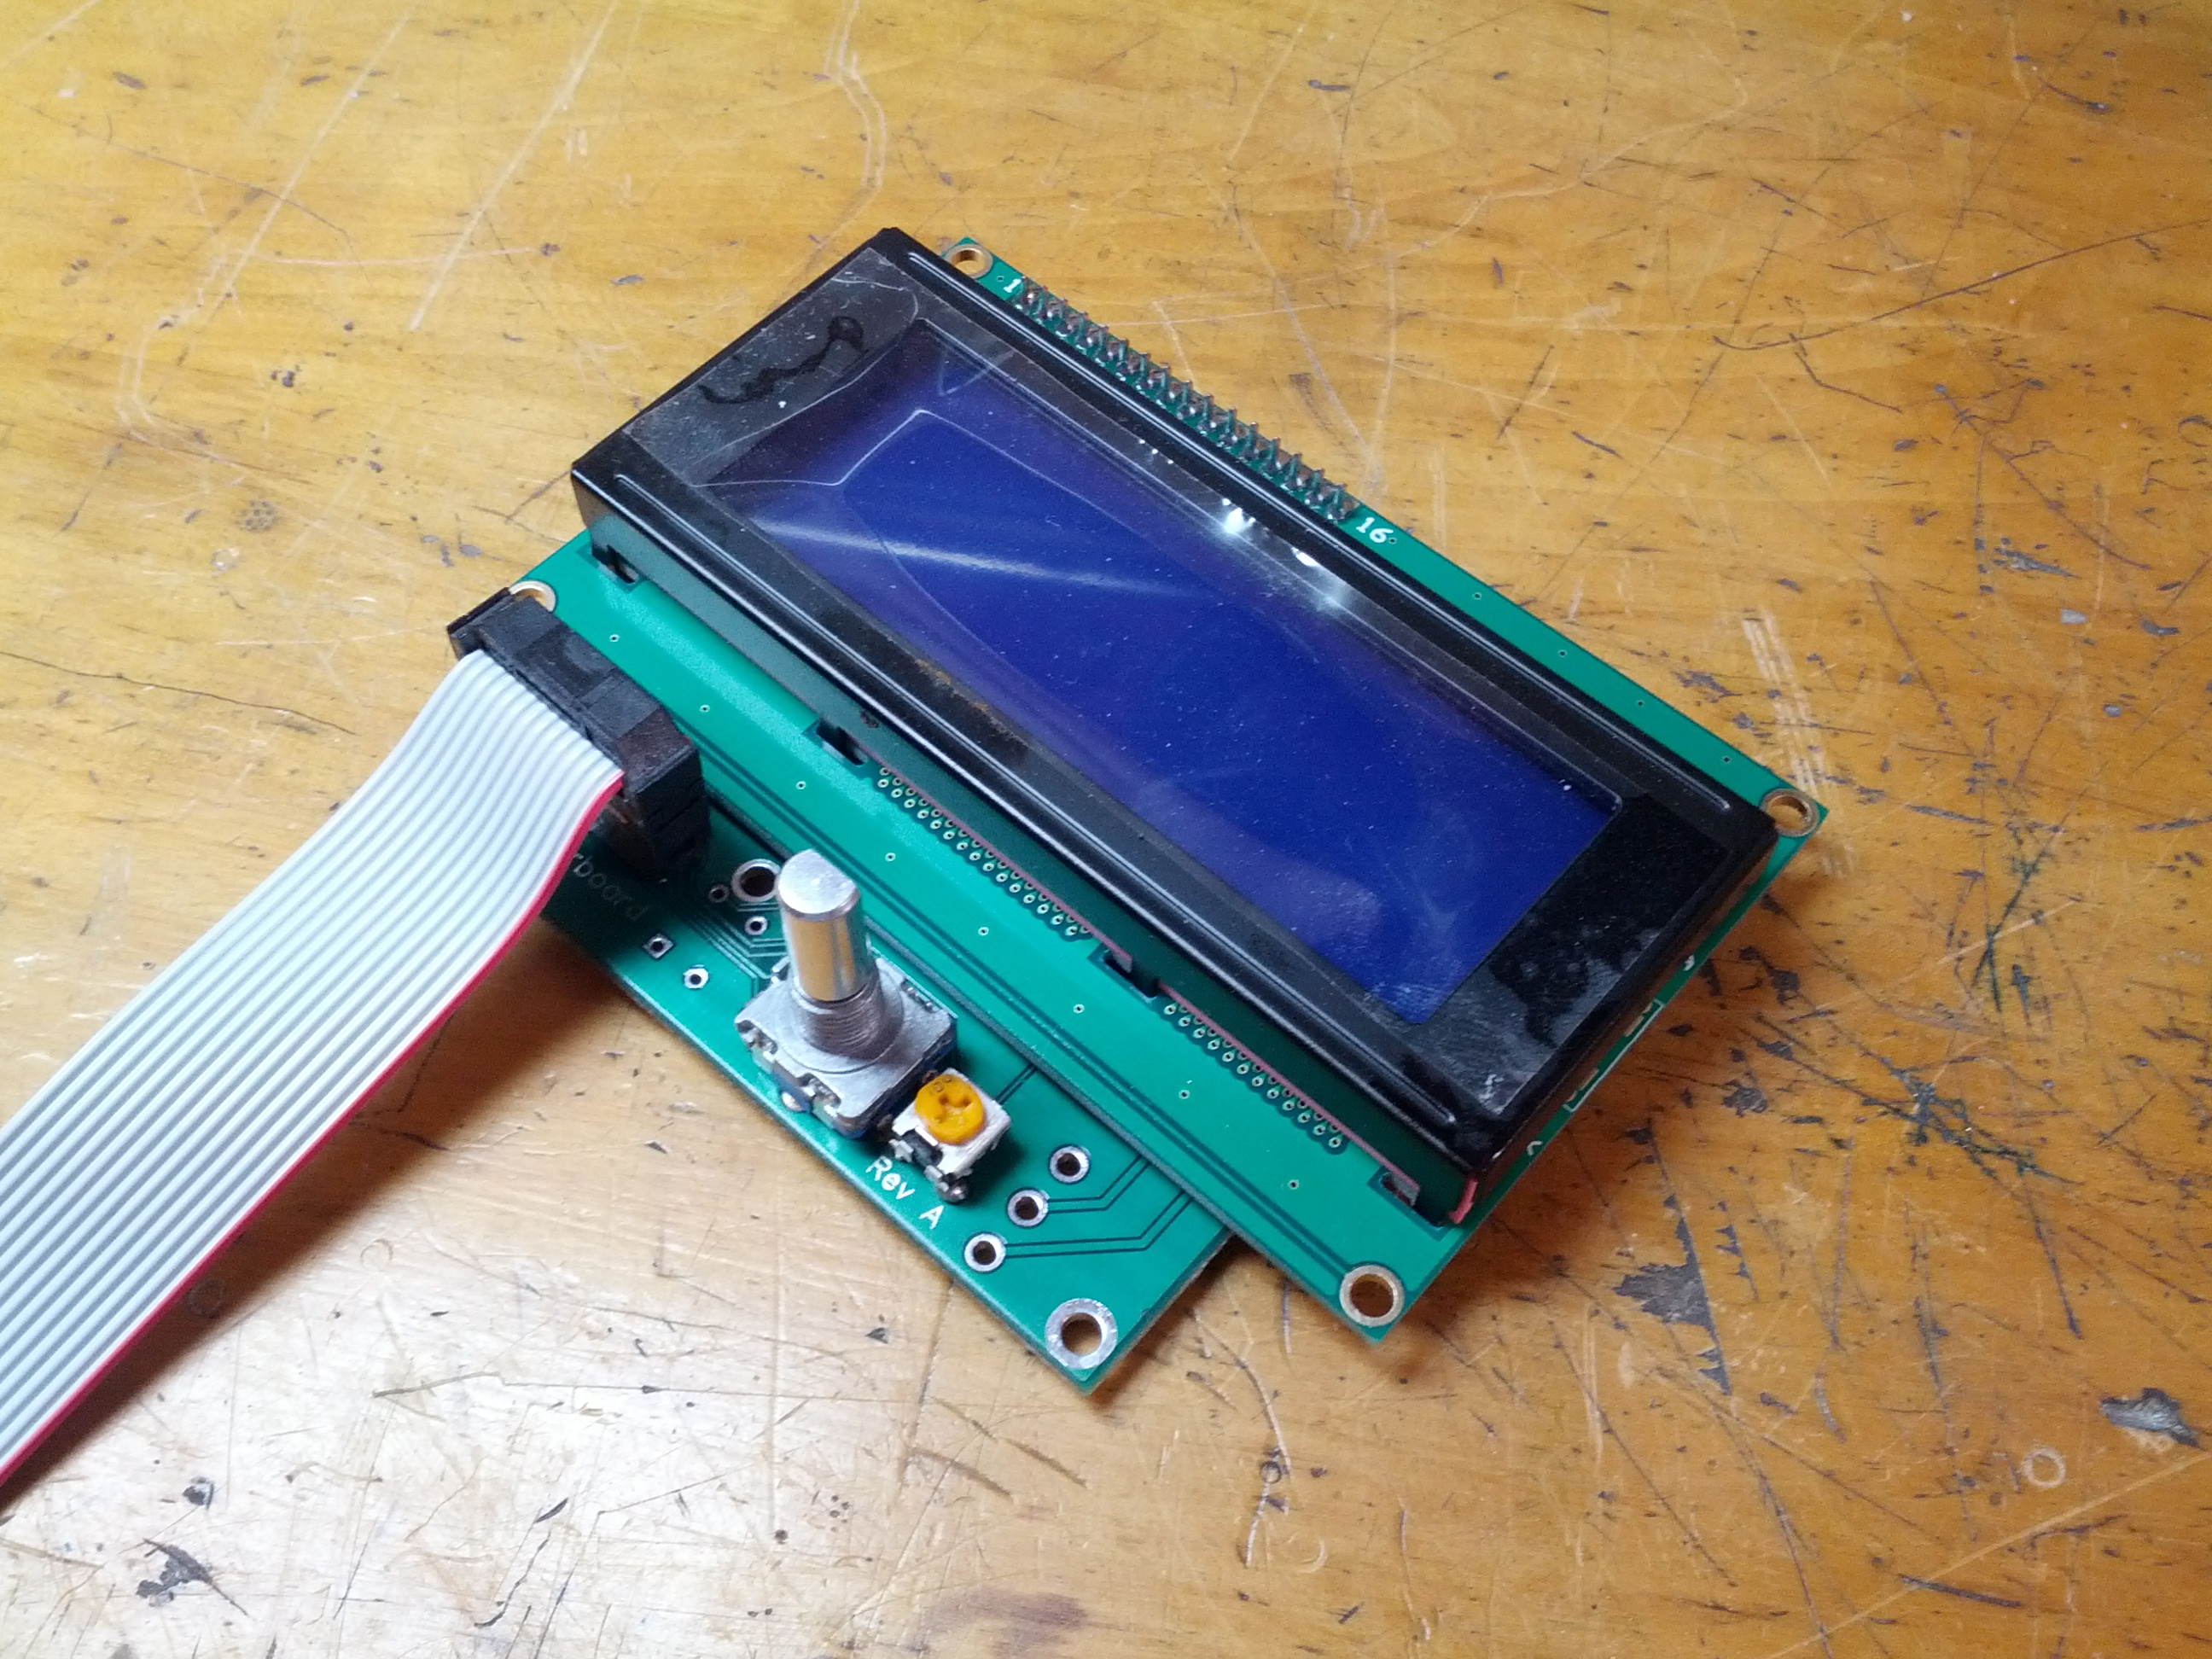
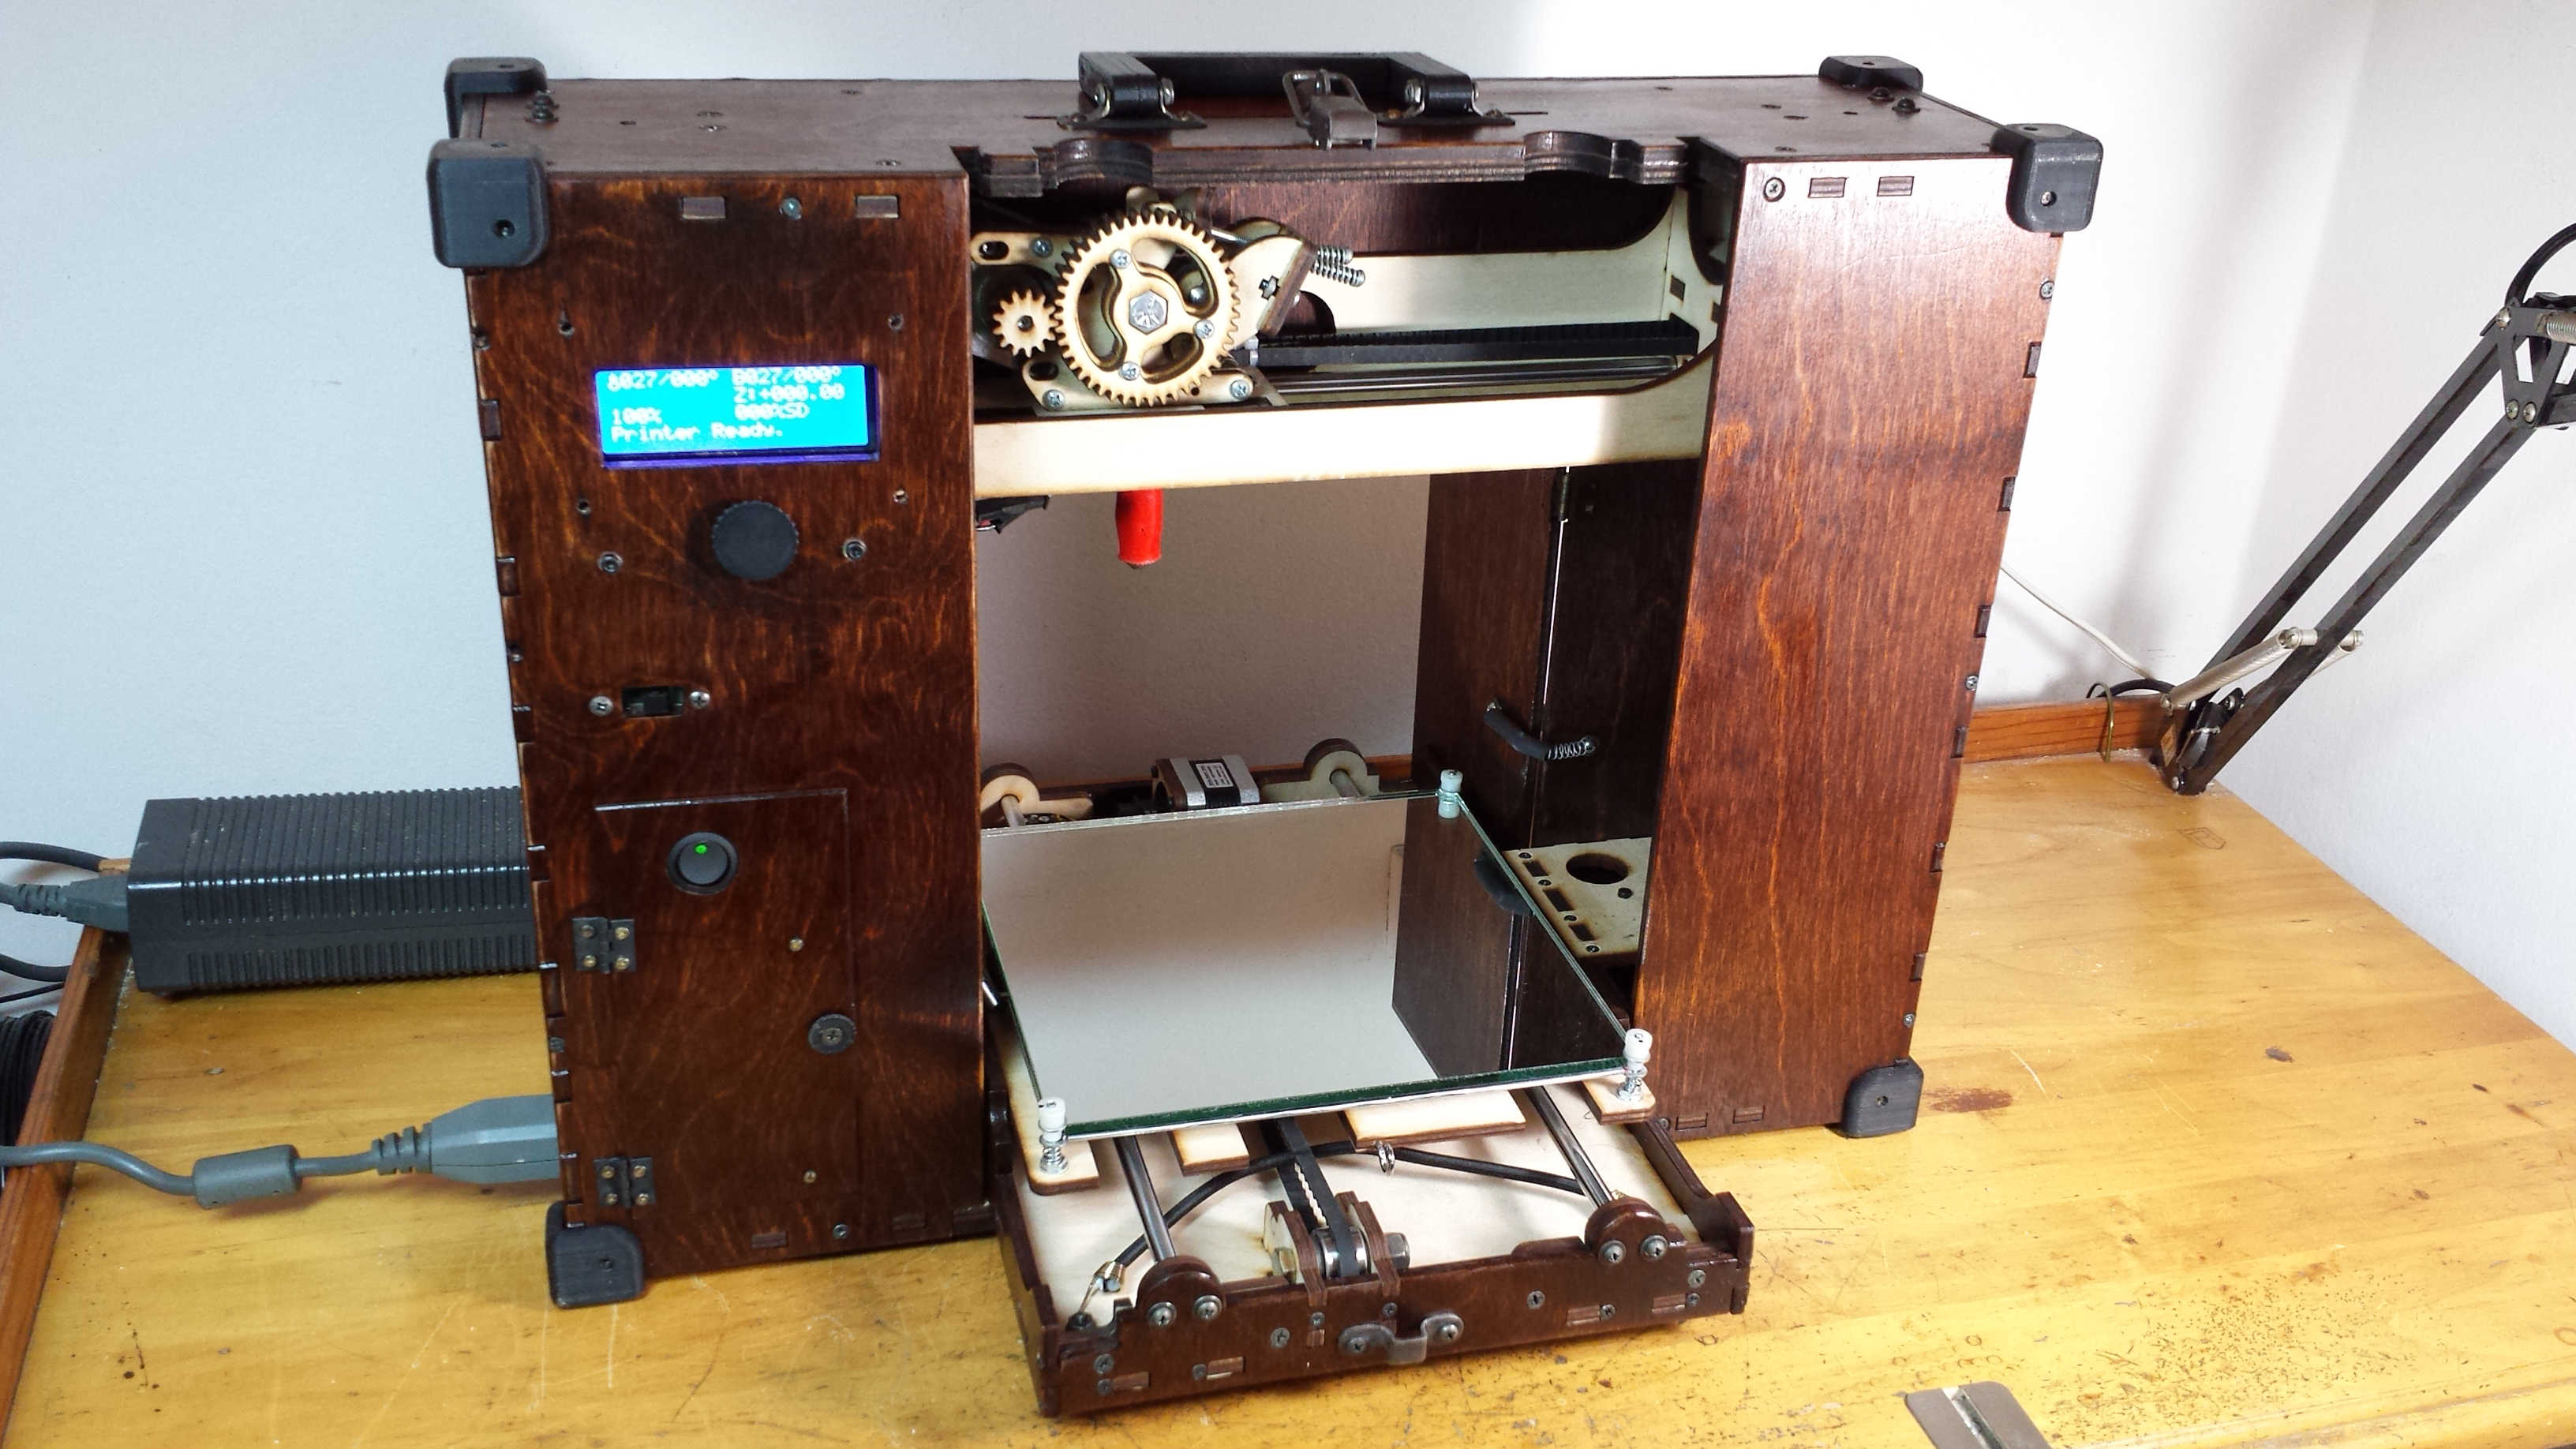
Printrbot apparently only had a very few of these things and when they put it up for sale I jumped on it. The LCD panel allows you to see what’s going on with your bot while it’s printing and the encoder (that’s what they call the control knob) allows you to select different menu items, adjust the temperature on the fly, move the axes or initiate a print, that kind of thing. It can do all of this without being connected to a computer, so if you have the sliced G-code already stored to your SD card, you can print without connecting to your PC. It’s worth mentioning that there are innumerable challenges involved in getting the LCD panel to play nice with the bot however.
What was not completely obvious to me before I pulled the trigger for this add-on, is that you have to load new firmware to the printrboard to make it work. Thankfully, smart people have been here before me. In particular, a very helpful bloke who goes by PxT had already modified the Marlin firmware (a variant of which is what ships on the printrboard) to work with the LCD panel and had made the files available on github. If you don’t know what firmware is or know what it means to “flash” it, much less how to compile it and have only the dimmest notion of what github is, then you know a little bit about how I felt trying to figure this stuff out. I have hacked around with my Android phones for a few years now, so the concept of flashing firmware was not entirely new to me, but let’s just say there is no beginner’s guide lying around anywhere for this kind of stuff.
I followed the firmware guide PxT had put together, supplementing the information with this handy post Plexus had put together on the subject also (Plexus was focusing on Mac issues, but a lot of the information still translated) and gradually slogged my way through it. The short and sweet version is that I needed the Arduino v022 (in the previous IDE versions section – for some reason this older version is required for the printrboard) to modify the Marlin fork that PxT had created (download the whole zip so you can modify the files) so I could recompile a hex file with the Y axis properly oriented and then use Flip 3.4.7 (by Atmel, after futzing around to get the drivers to install) to flash the hex file to the printrboard after rebooting it with an aligator clip substituting for a boot jumper. Clear as day, right?
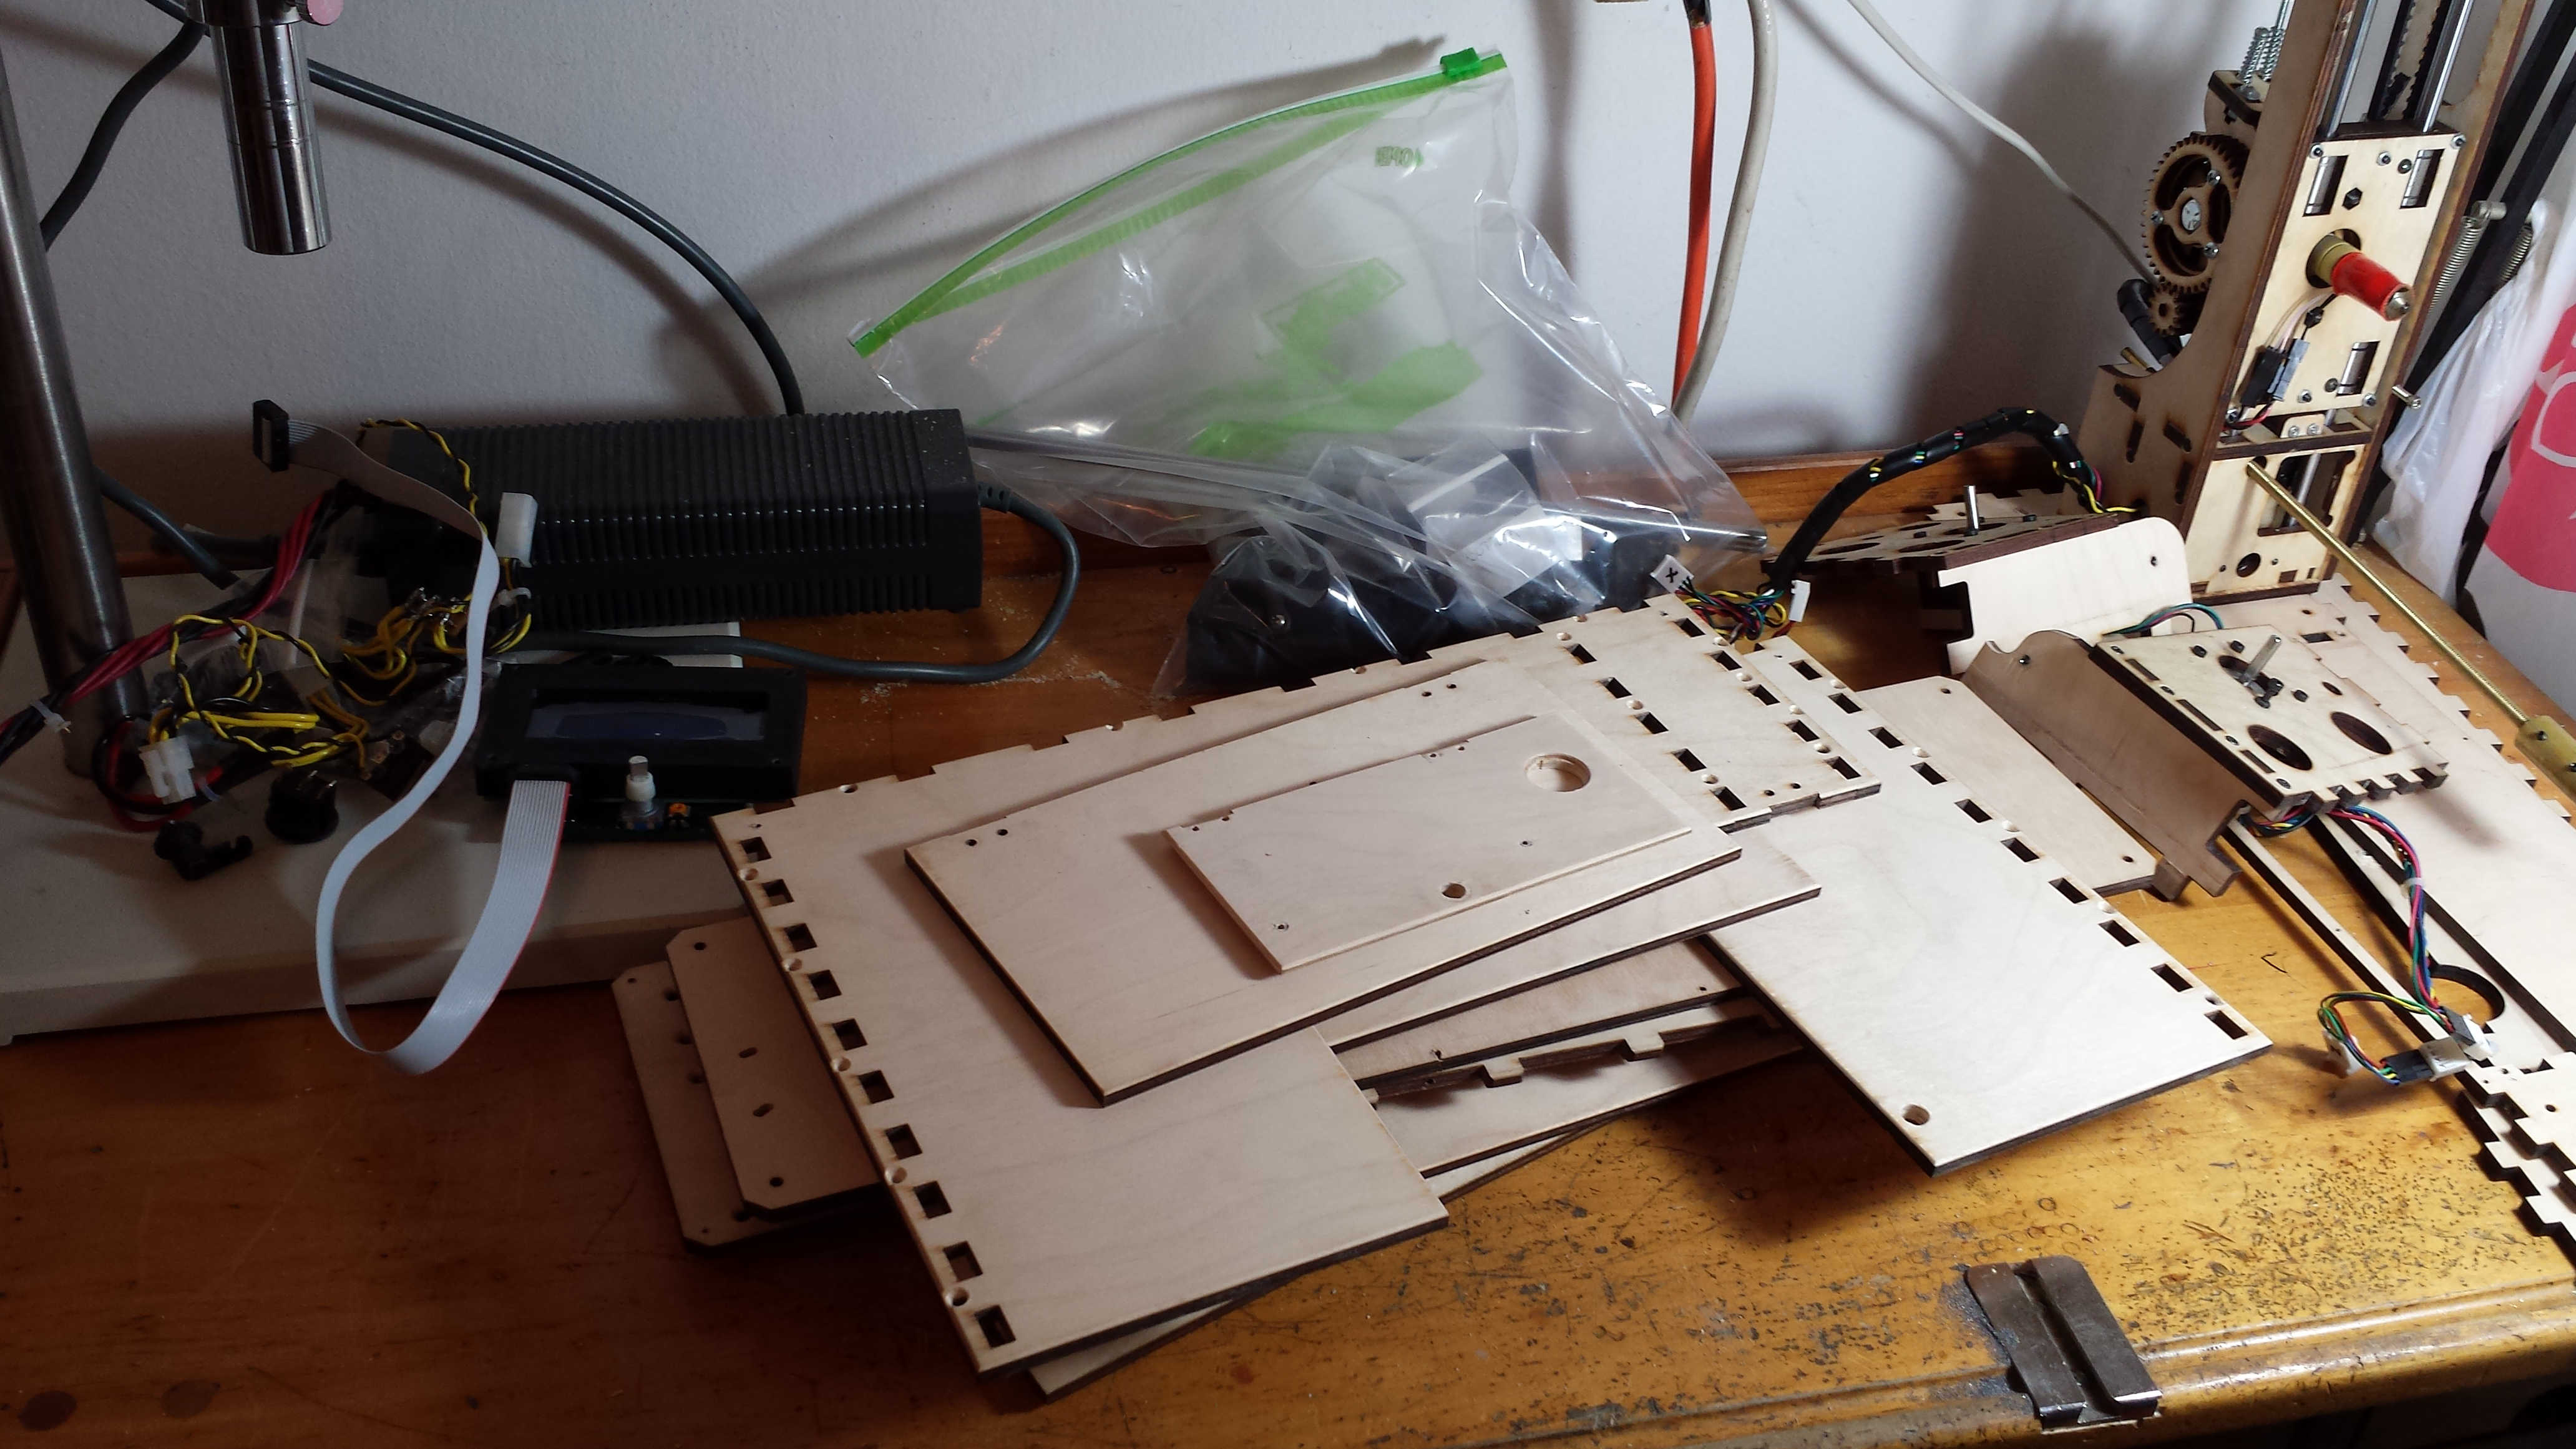
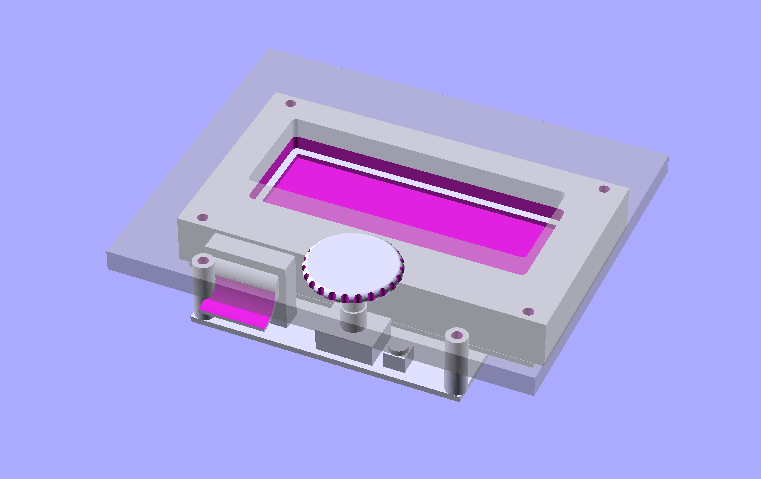
So after I confirmed that I was indeed able to control the bot using this fancy new LCD panel, I set about designing a simple mount for it inside the GO. The first step was just modelling the LCD panel itself so that I could know what I was dealing with, and I decided to upload that to Thingiverse in case other folks have a similar idea and want a model to start out with. I wanted to just cut a hole for the display and one for the encoded knob in the front panel of the GO, but it turned out I also had to mill out a little recess for the ribbon cable connector to keep the whole contraption from being even more unrealistically deep inside the bot.
Things are mighty tight inside the GO already as far as wiring is concerned, but I’m hoping that the amount of recess I’ve settled on will allow everything to move around freely once it’s all mounted and the wiring is secured.
I also modified the aluminum Z guide rod blocks Brook sent me so that I could use them in the top of GO. There wasn’t really a good way to install them in the bottom of the bot that I could figure out, but by drilling the holes for the guides rods all the way through and then drilling and tapping some holes to match the holes in the wooden donuts for the Z guide rods I was able to squeeze these aluminum blocks under the top of the box. I’m confident they’ll help to cut down on the rattling sounds the guide rods sometimes make, but I’m not sure they will be worth the hassle really (probably jamming some plastic sheeting in around the tops of the rods would be sufficient). You can just see one of these blocks in the partially assembled pic below.
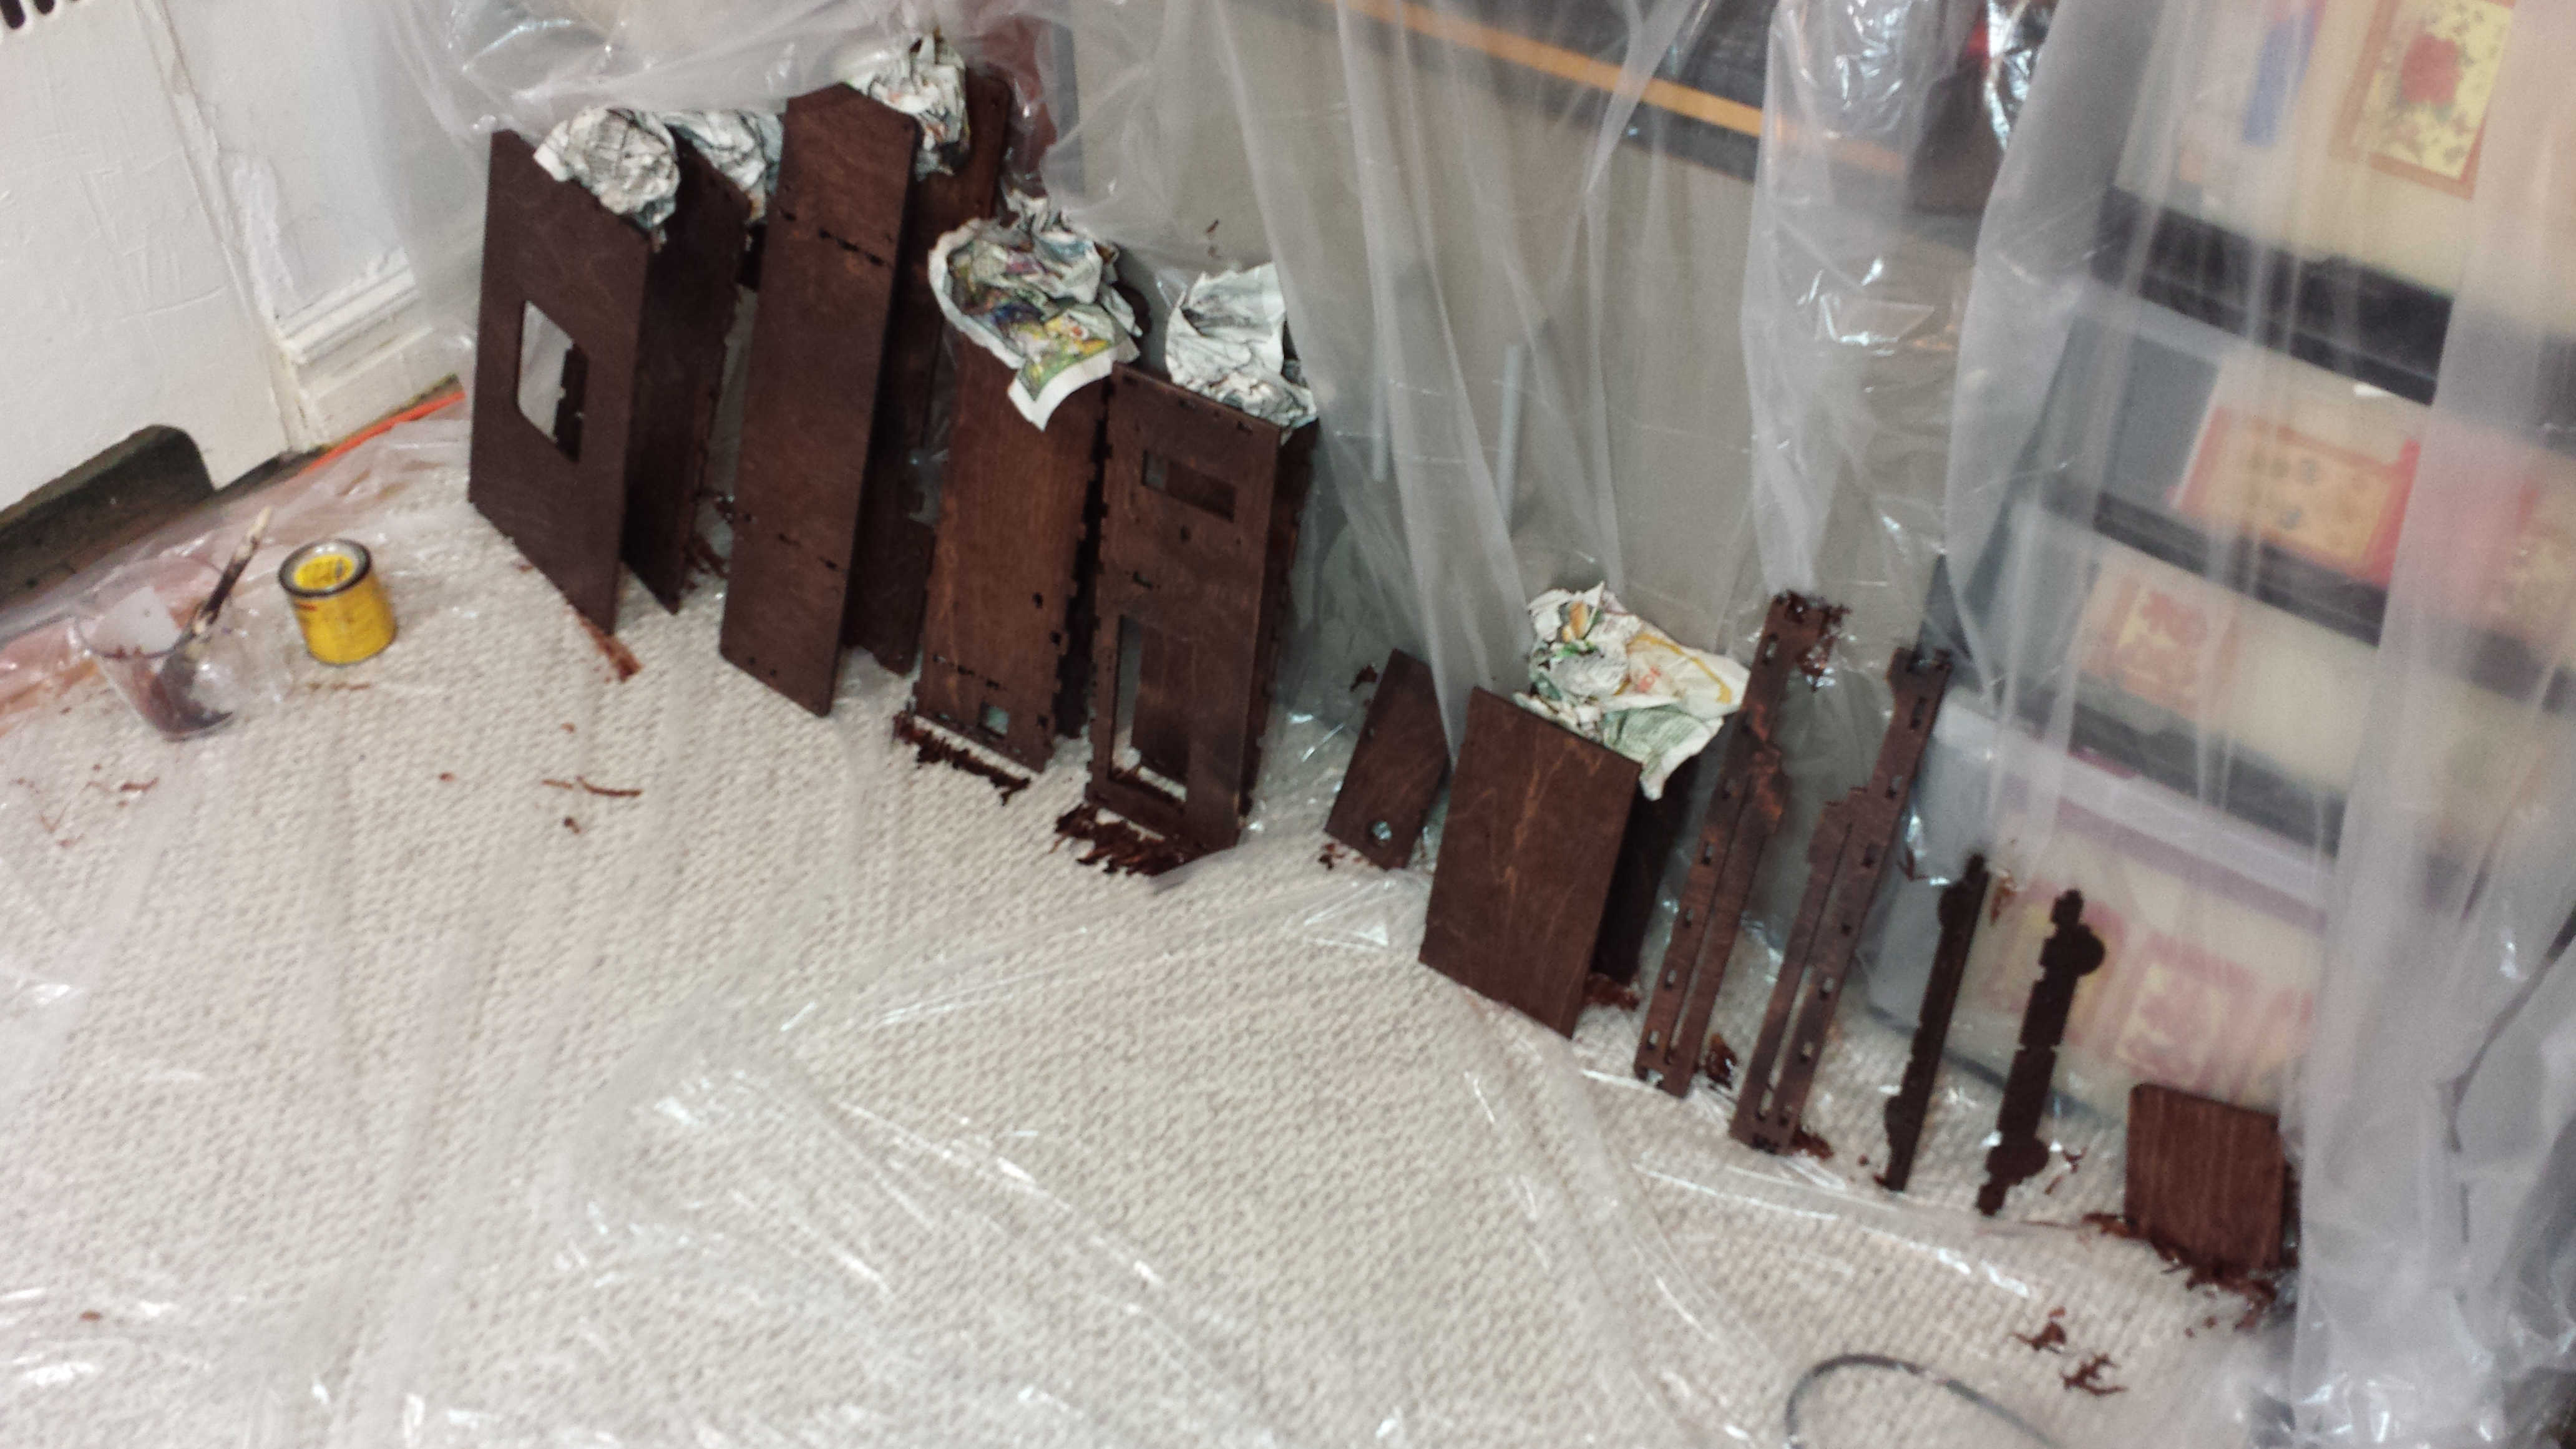
So I went about staining with MinWax Red Mahogany 225 (after adding a little TransTint Reddish Brown #6003) after covering about half of my tiny shop with a plastic drop cloth. I brushed the stain on and left if for about 15 or 20 minutes before wiping it off and then left each of the panels propped up with maximum circulation to dry overnight. This wasn’t quite as disastrously messy as I anticipated.
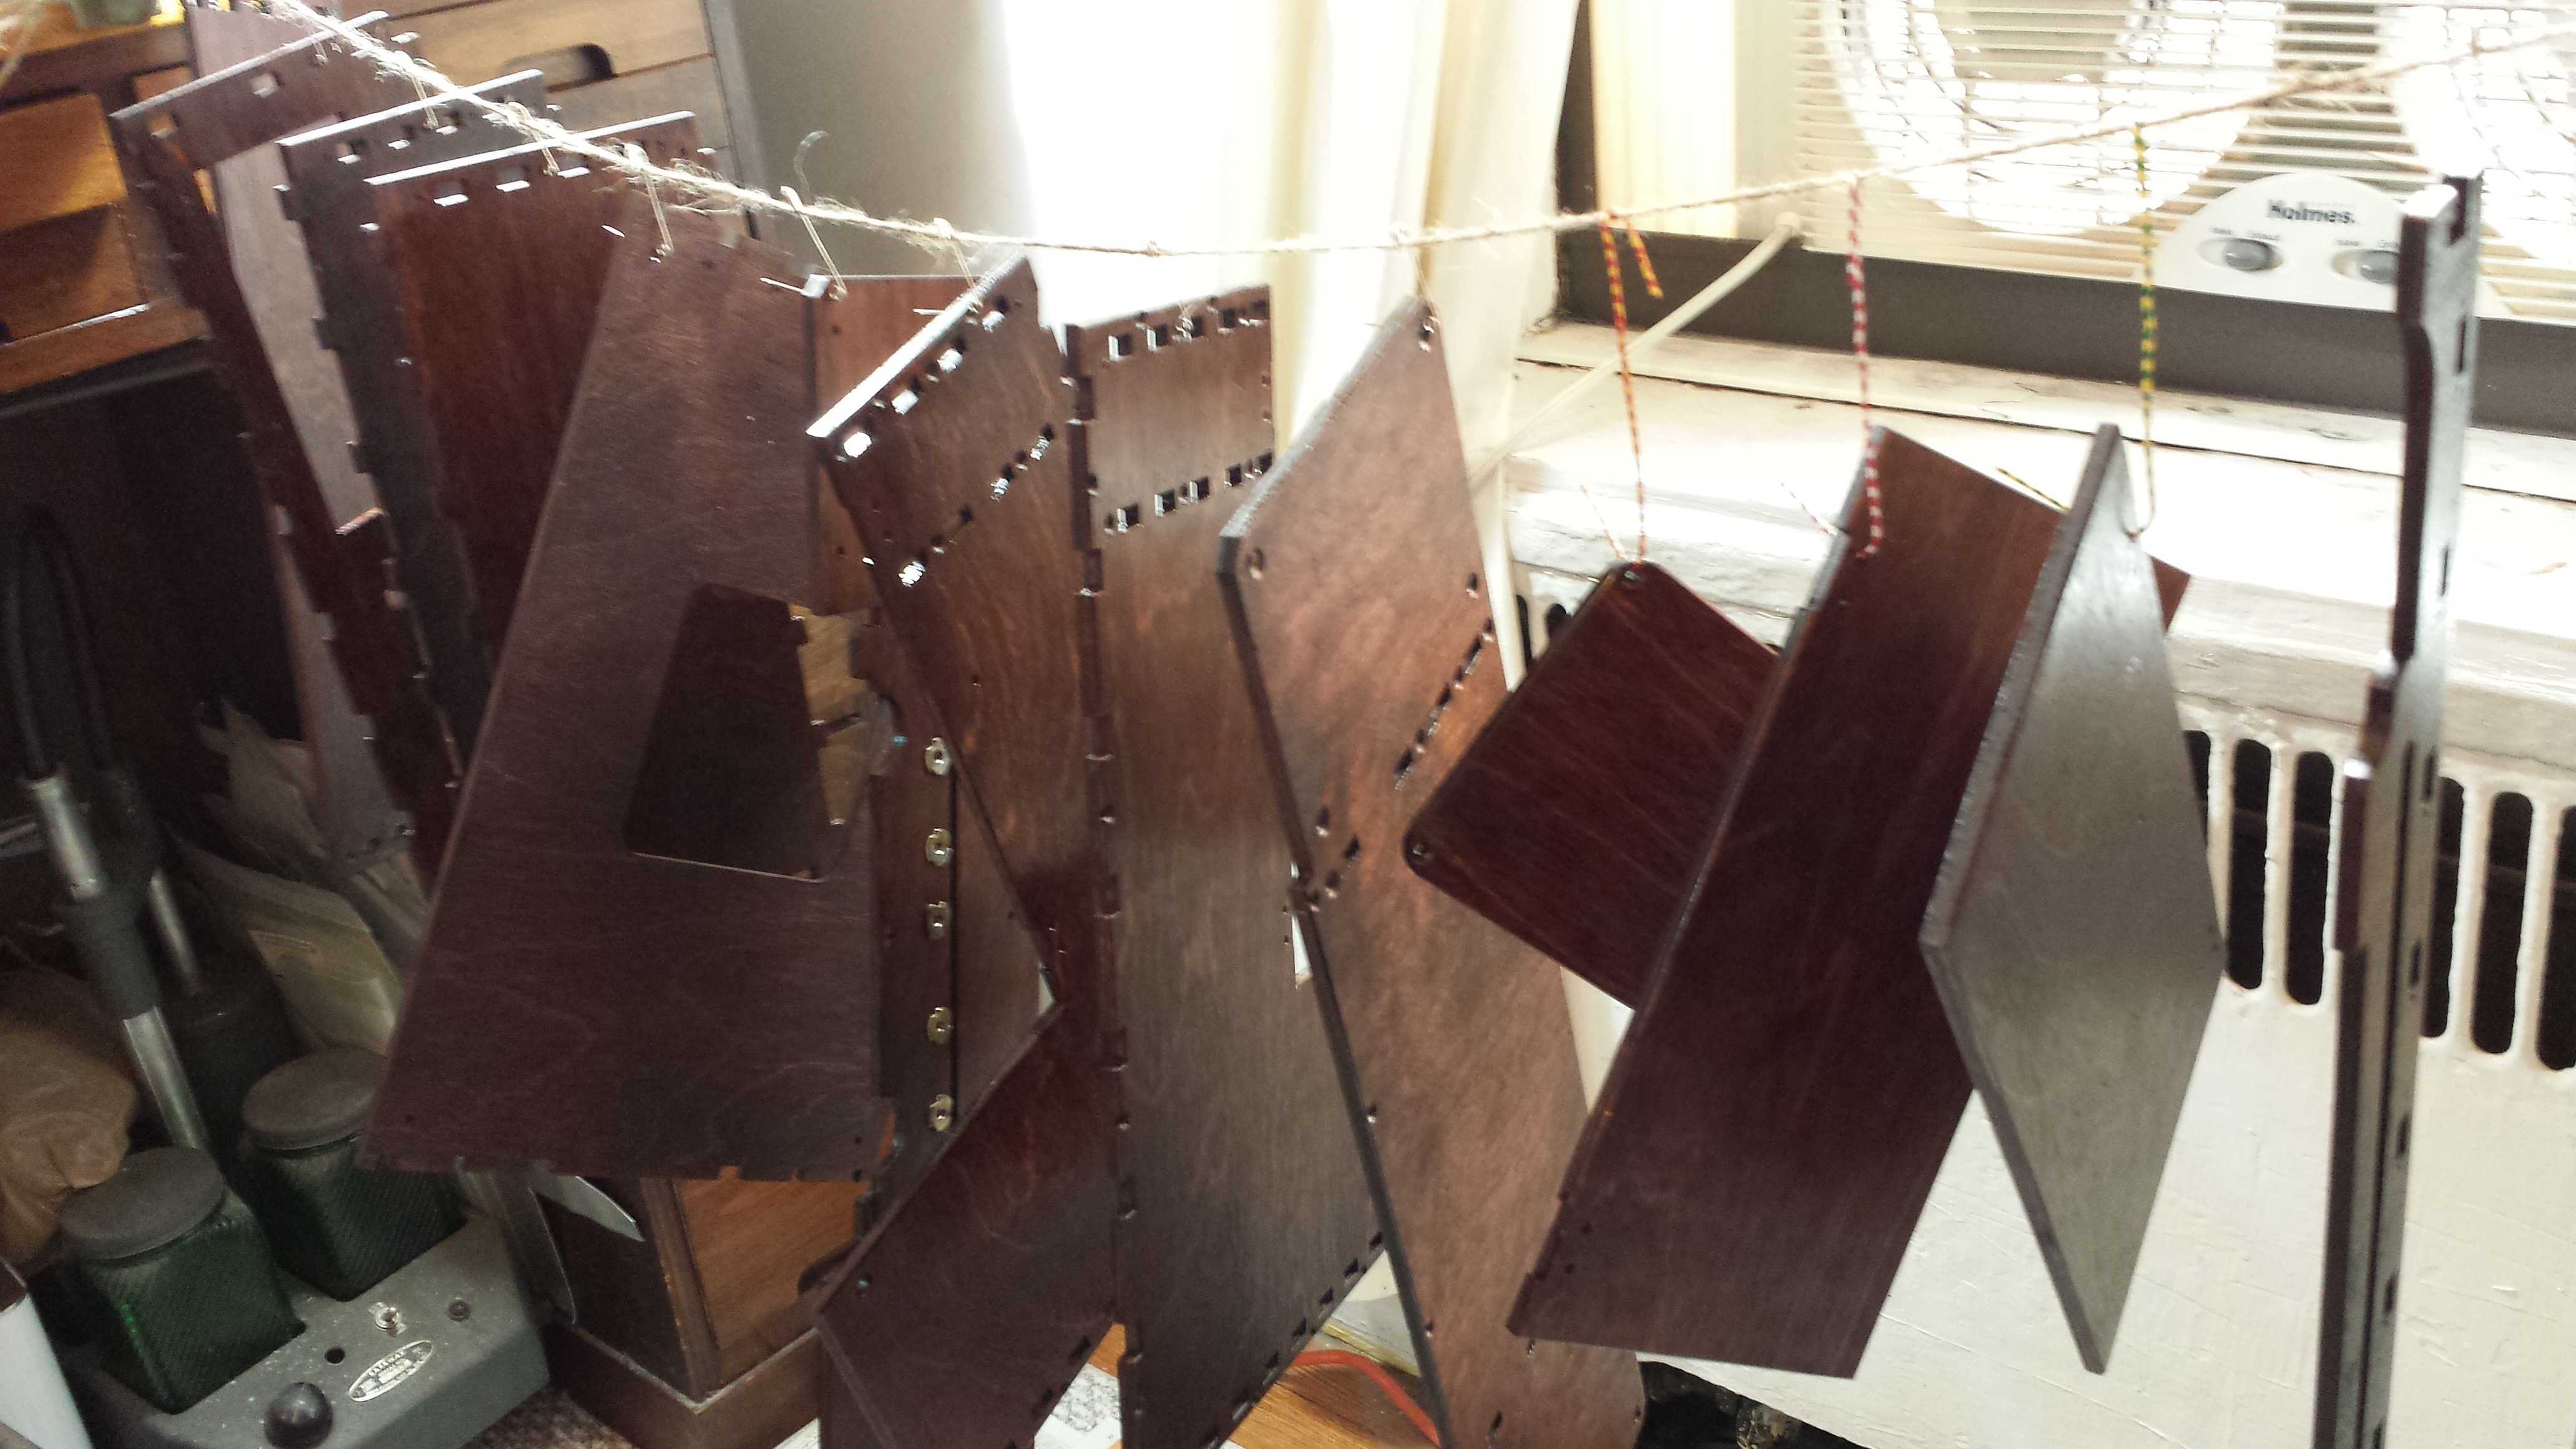
The next morning I jumped in with amber shellac. No, I wasn’t clever enough to get the de-waxed stuff nor was I diligent enough to make my own. I brushed it on without diluting it (Zinser Bulls Eye Amber Shellac), let it dry for a few hours, then thinned the shellac with denatured alcohol and brushed on another coat. I probably should’ve done at least three coats, but alas, I was lazy.
I intended to rub out the panels with mineral spirits and mineral oil and sandpaper, but could only find turpentine at the local hardware store so decided to give it a go with that. Shellac is apparently moderately soluble in turpentine, so sanding with it was probably not a great idea, but it did allow me to smooth things considerably as long as I wasn’t too aggressive and wiped off the turpentine immediately after sanding. On the couple panels where I was too aggressive I had to re-shellac them the next day since they looked much too “dry” compared to the others. I finished the wood panels off with a once over with Old English Dark Wood Scratch Filler or some such stuff that the local hardware guy insisted was just as good as furniture polish. What do I know? It worked fine. Well, it didn’t seem to damage anything at least.
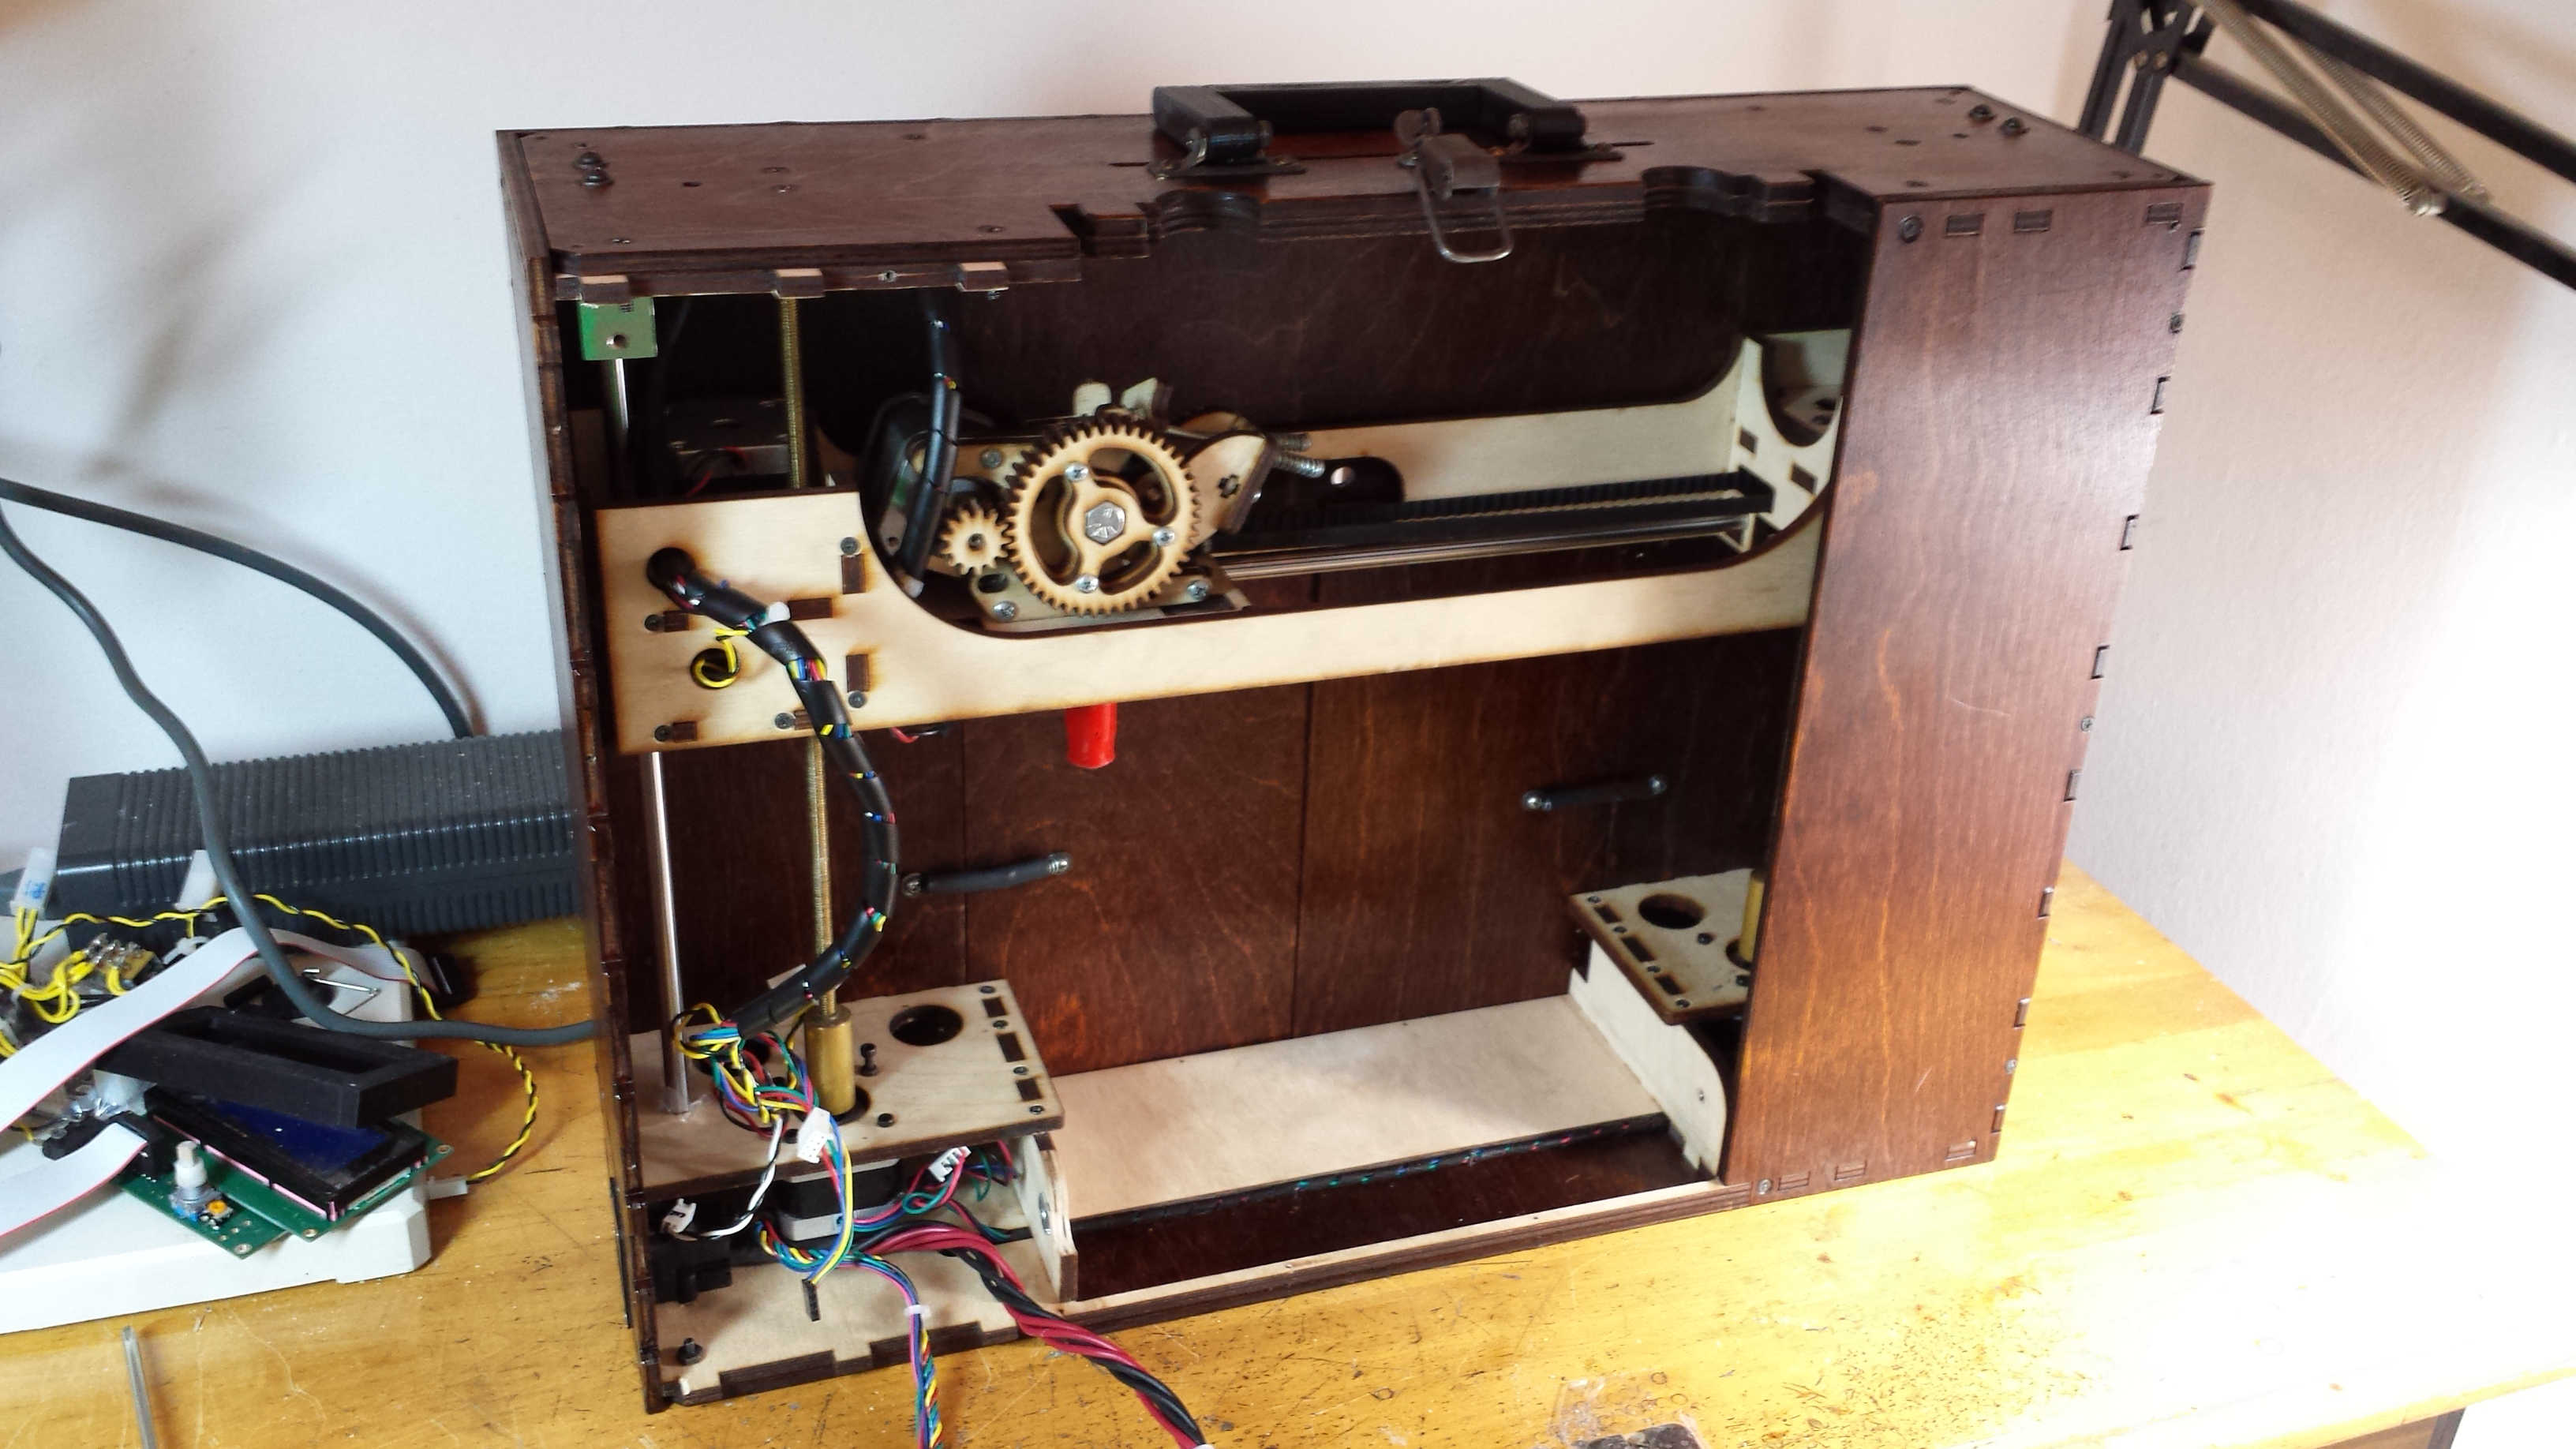
The reassembly was pretty much routine up until about this point. I tried to figure out some workarounds for the fact that I have not yet received the long, thin machine screws I’ve ordered for the LCD mount (3-48 x 1 in is not something you can find in most hardware stores, especially in brass), but couldn’t come up with anything other than kinda dangling the LCD behind the front panel by the two posts for now. Very kludgy.
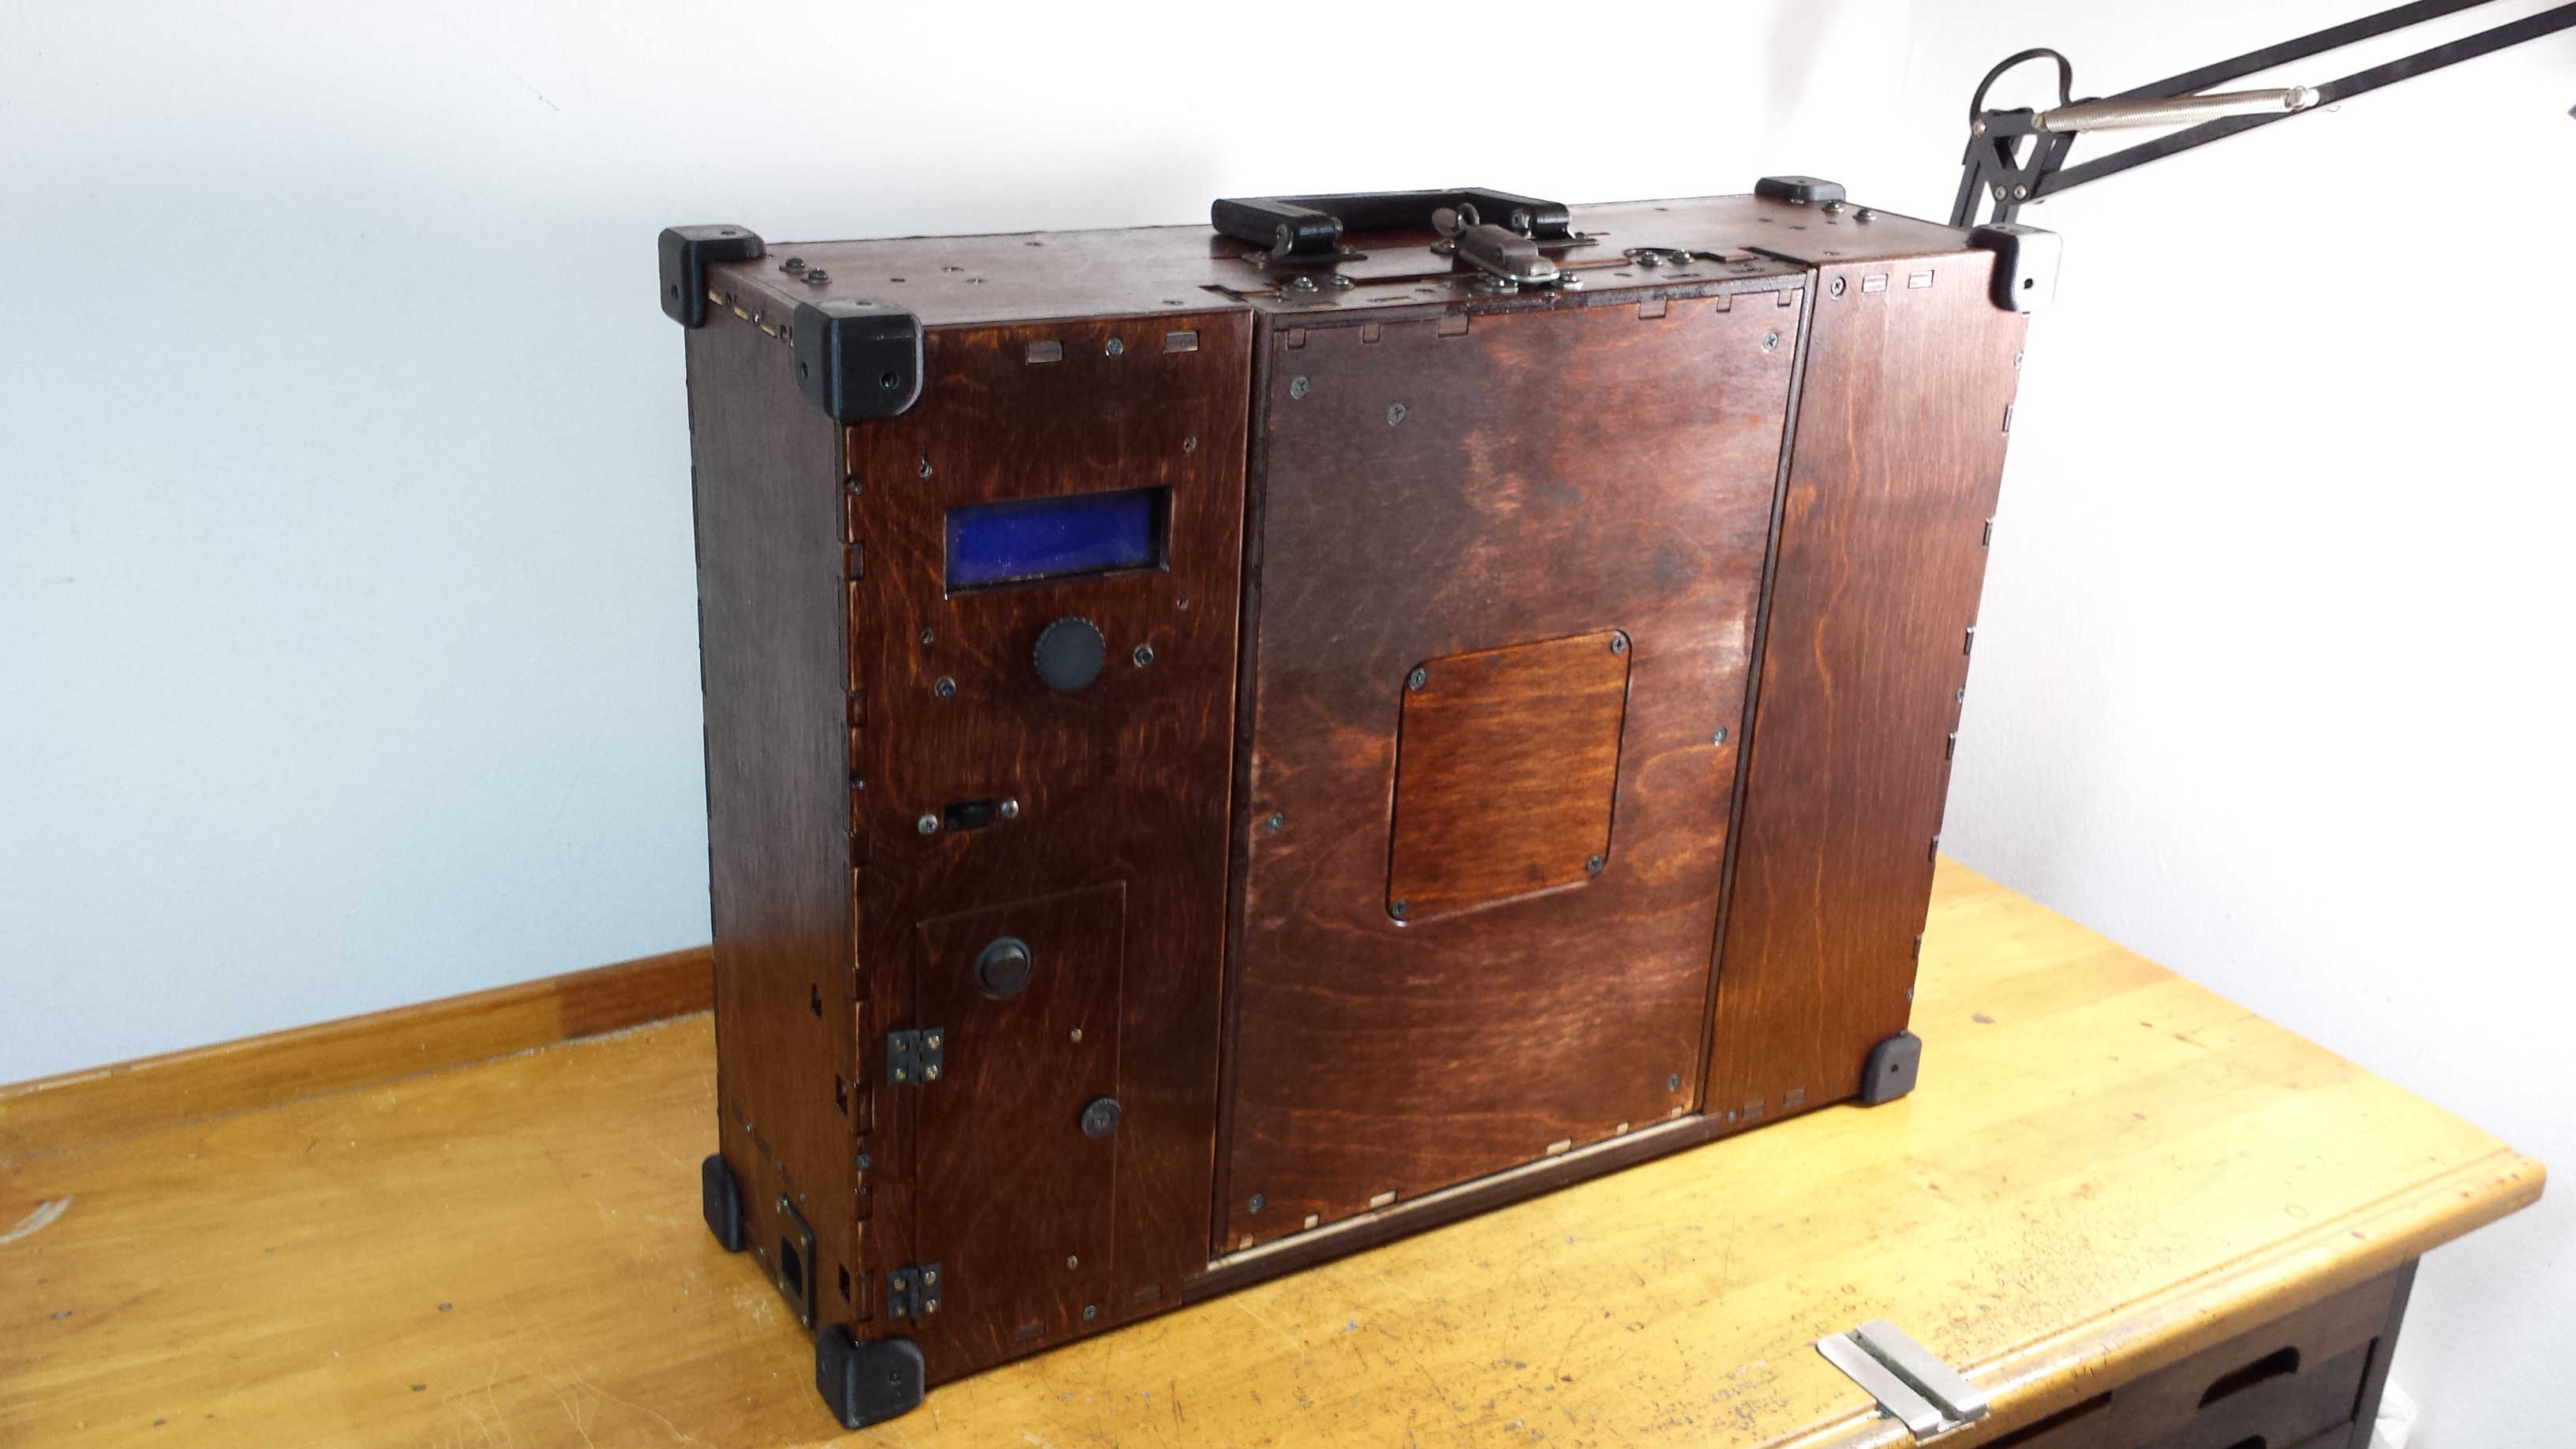
And then only after putting the thing back together completely did I realize how many little unstained bits you can see when it’s folded into suitcase mode. Gotta go back and touch those things up I think, at least with stain, not sure I want to try to spot-shellac something and lord knows I’m not taking the thing apart again right away unless something crazy happens.
Good job with the stain. I like the darker distressed look with the lighter inside. I cant wait to paint mine, I just need to figure out a color scheme.
Thanks! I’m not totally satisfied with the color (it’s darker than I wanted) and I can now appreciate the warnings about trying to stain a cheap wood like birch ply, but it definitely has a unique character now. If I get ambitious, I may sand most of the color off and shellac it a few more times with some reddish tint in amber shellac. I’ve to another purely aesthetic mod I plan to do to it first though to bring out the steampunk look.